Relay Race Guide
This page helps users quickly and independently create relay races. Through clear and simple steps and operations, users can easily set up events, groups, and routes, and achieve efficient event management. This page can help you get started quickly and ensure the smooth running of the event.
Step 1: Create Event
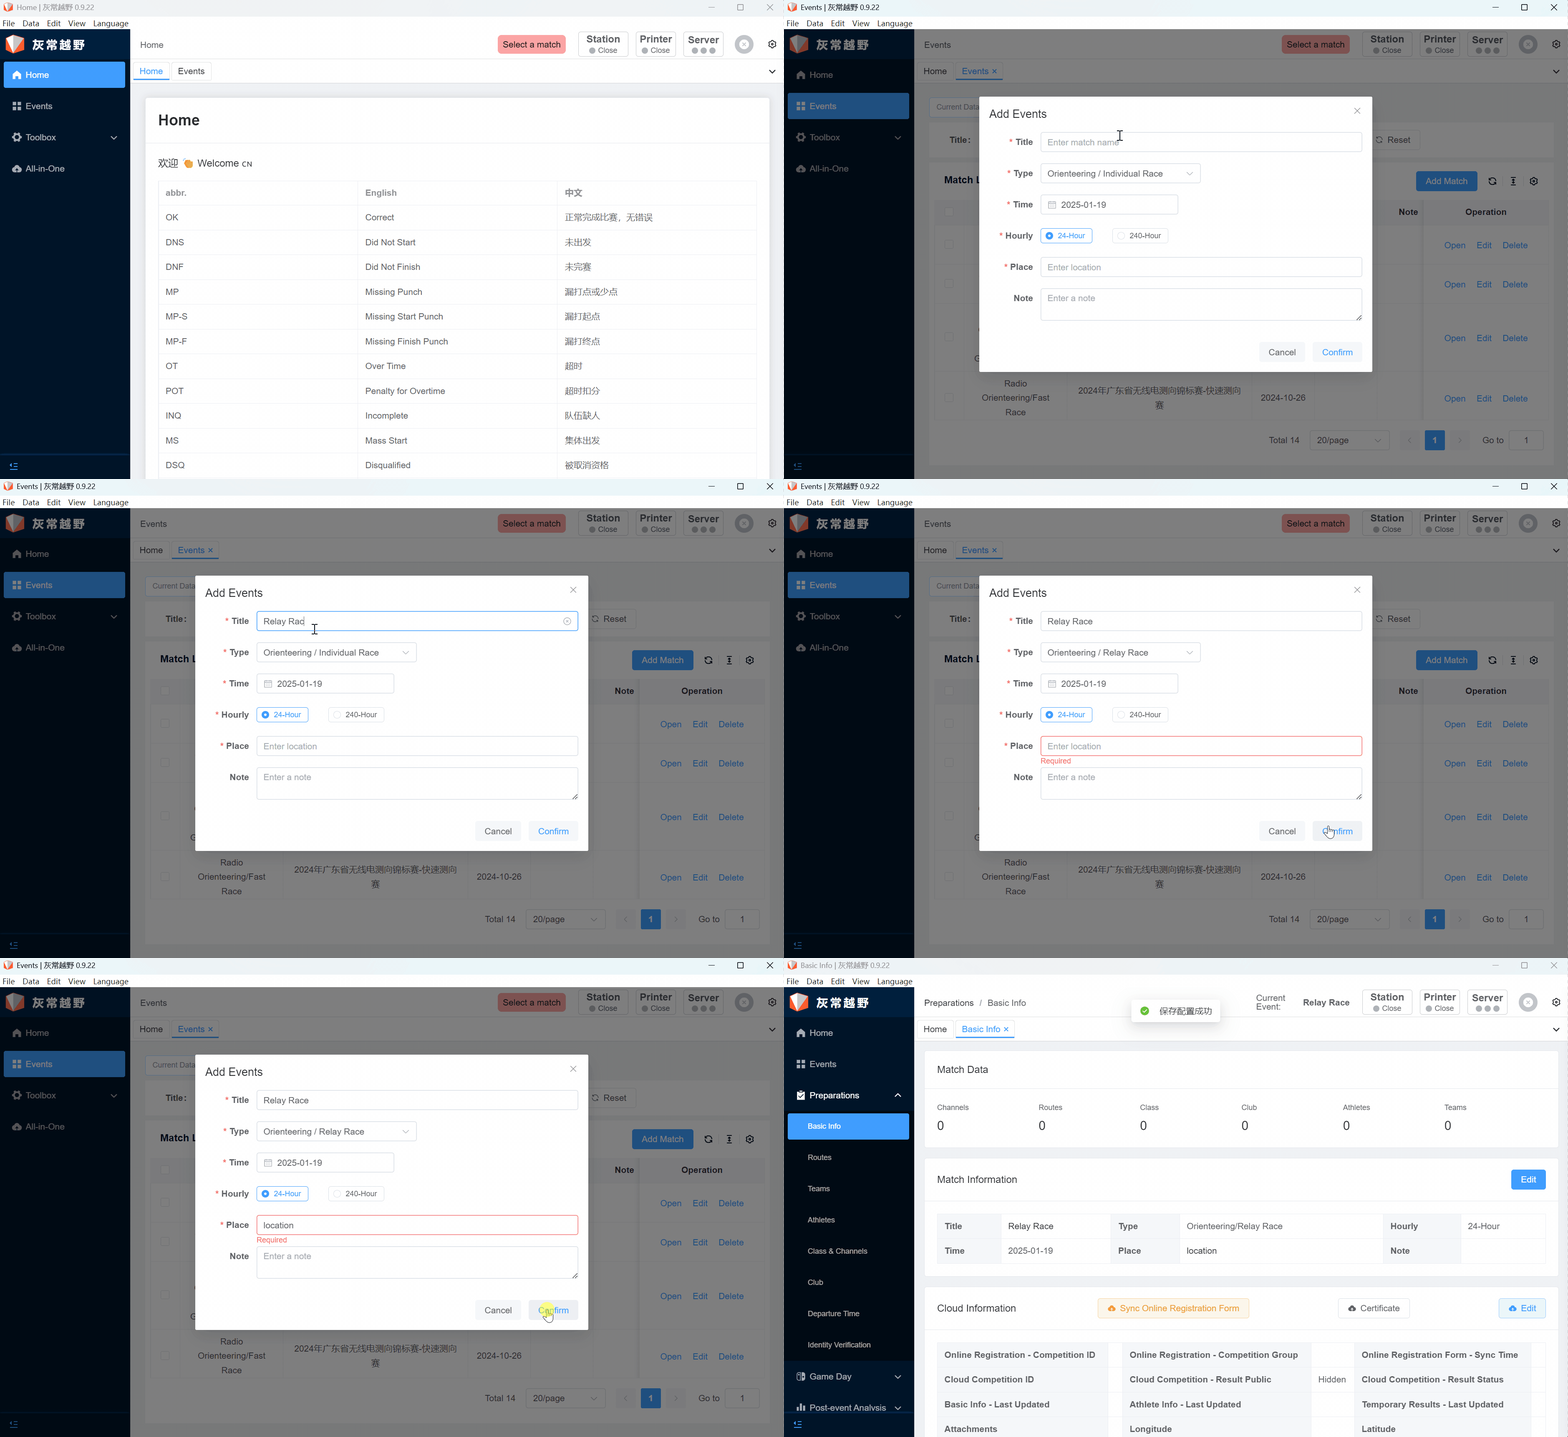
After entering the scoring software, click the Event column under the left menu bar, select New Event, fill in the content of the event, and complete the event creation. Click the Open button to enter the event.
Step 2: Route
When creating routes, pay attention to the following points:
- Create routes first (import), then import athlete lists
- Route naming convention:
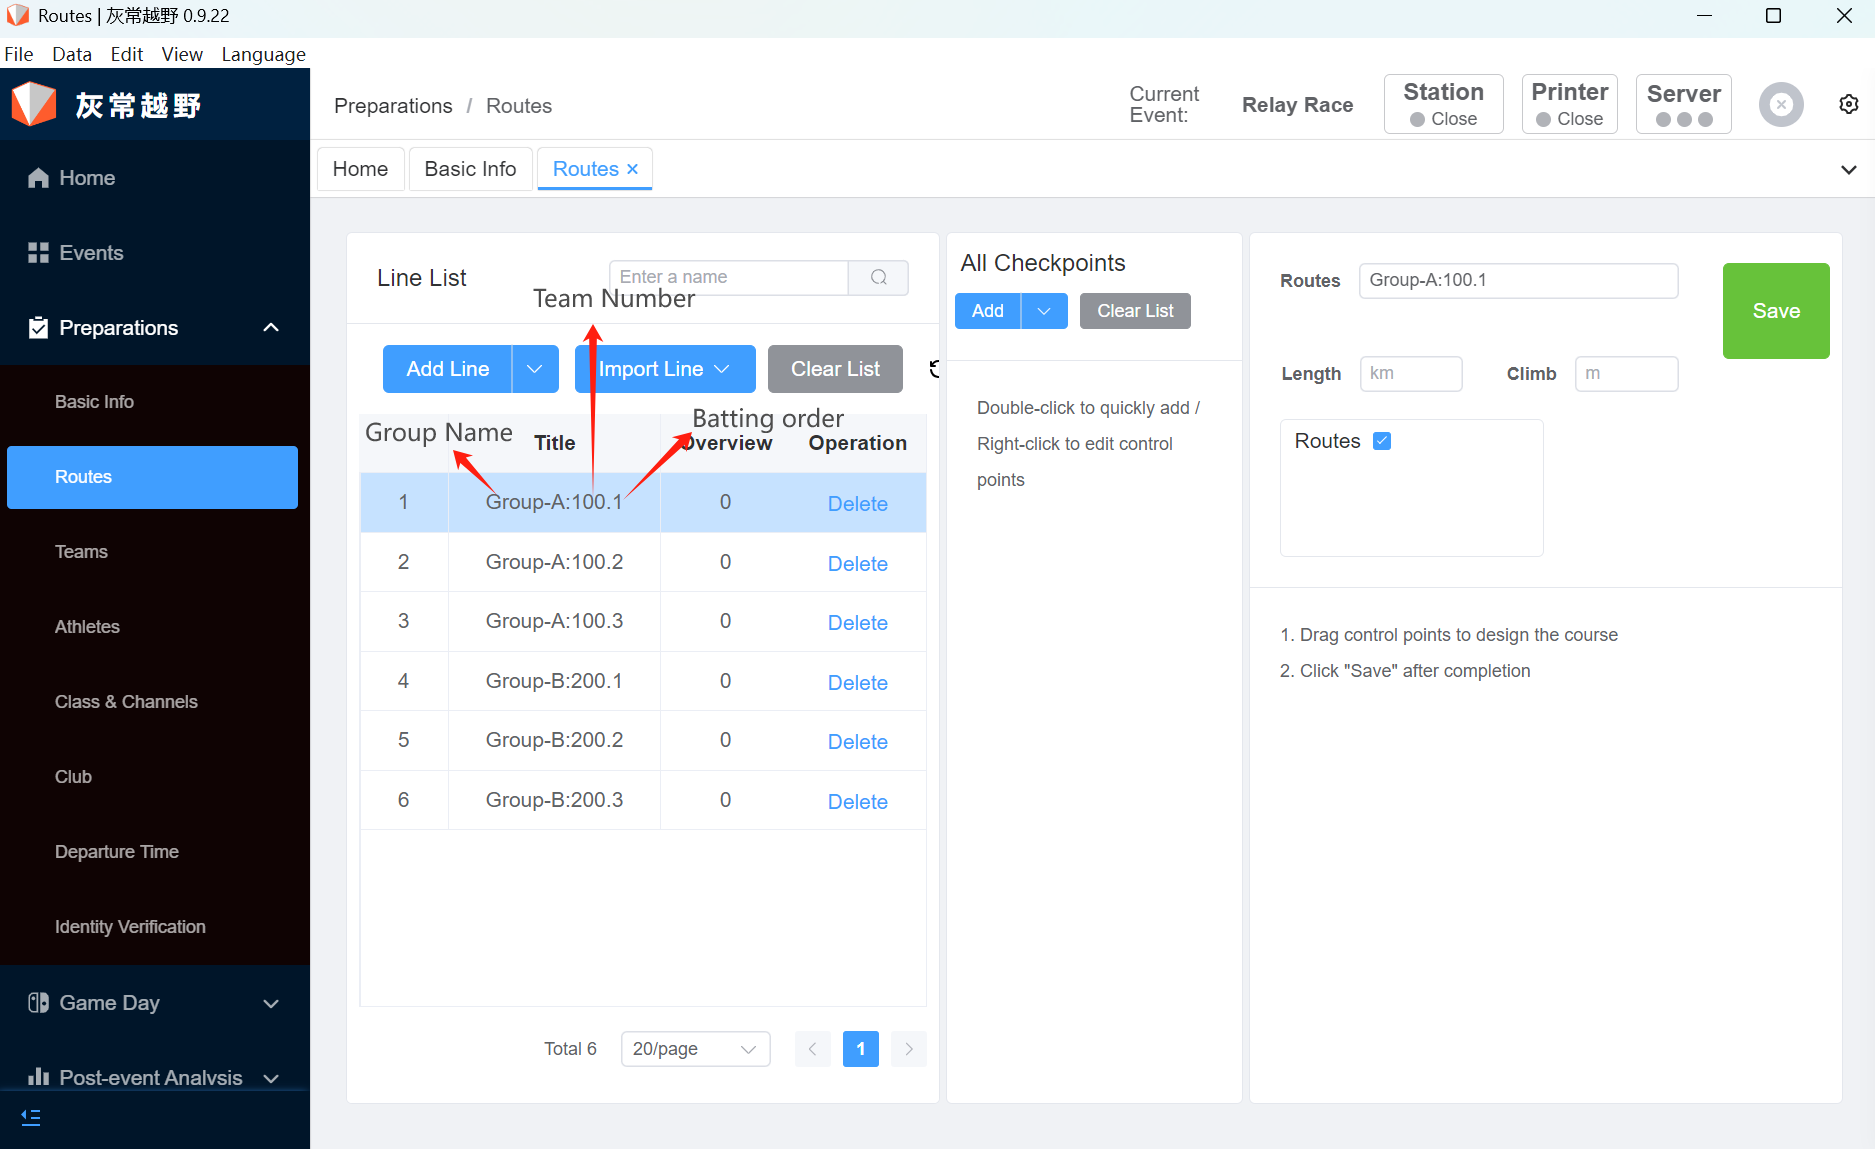
Group name: Team number. Batting order - Route names cannot be duplicated
2.1 Create Route
2.1.1 Manual Creation
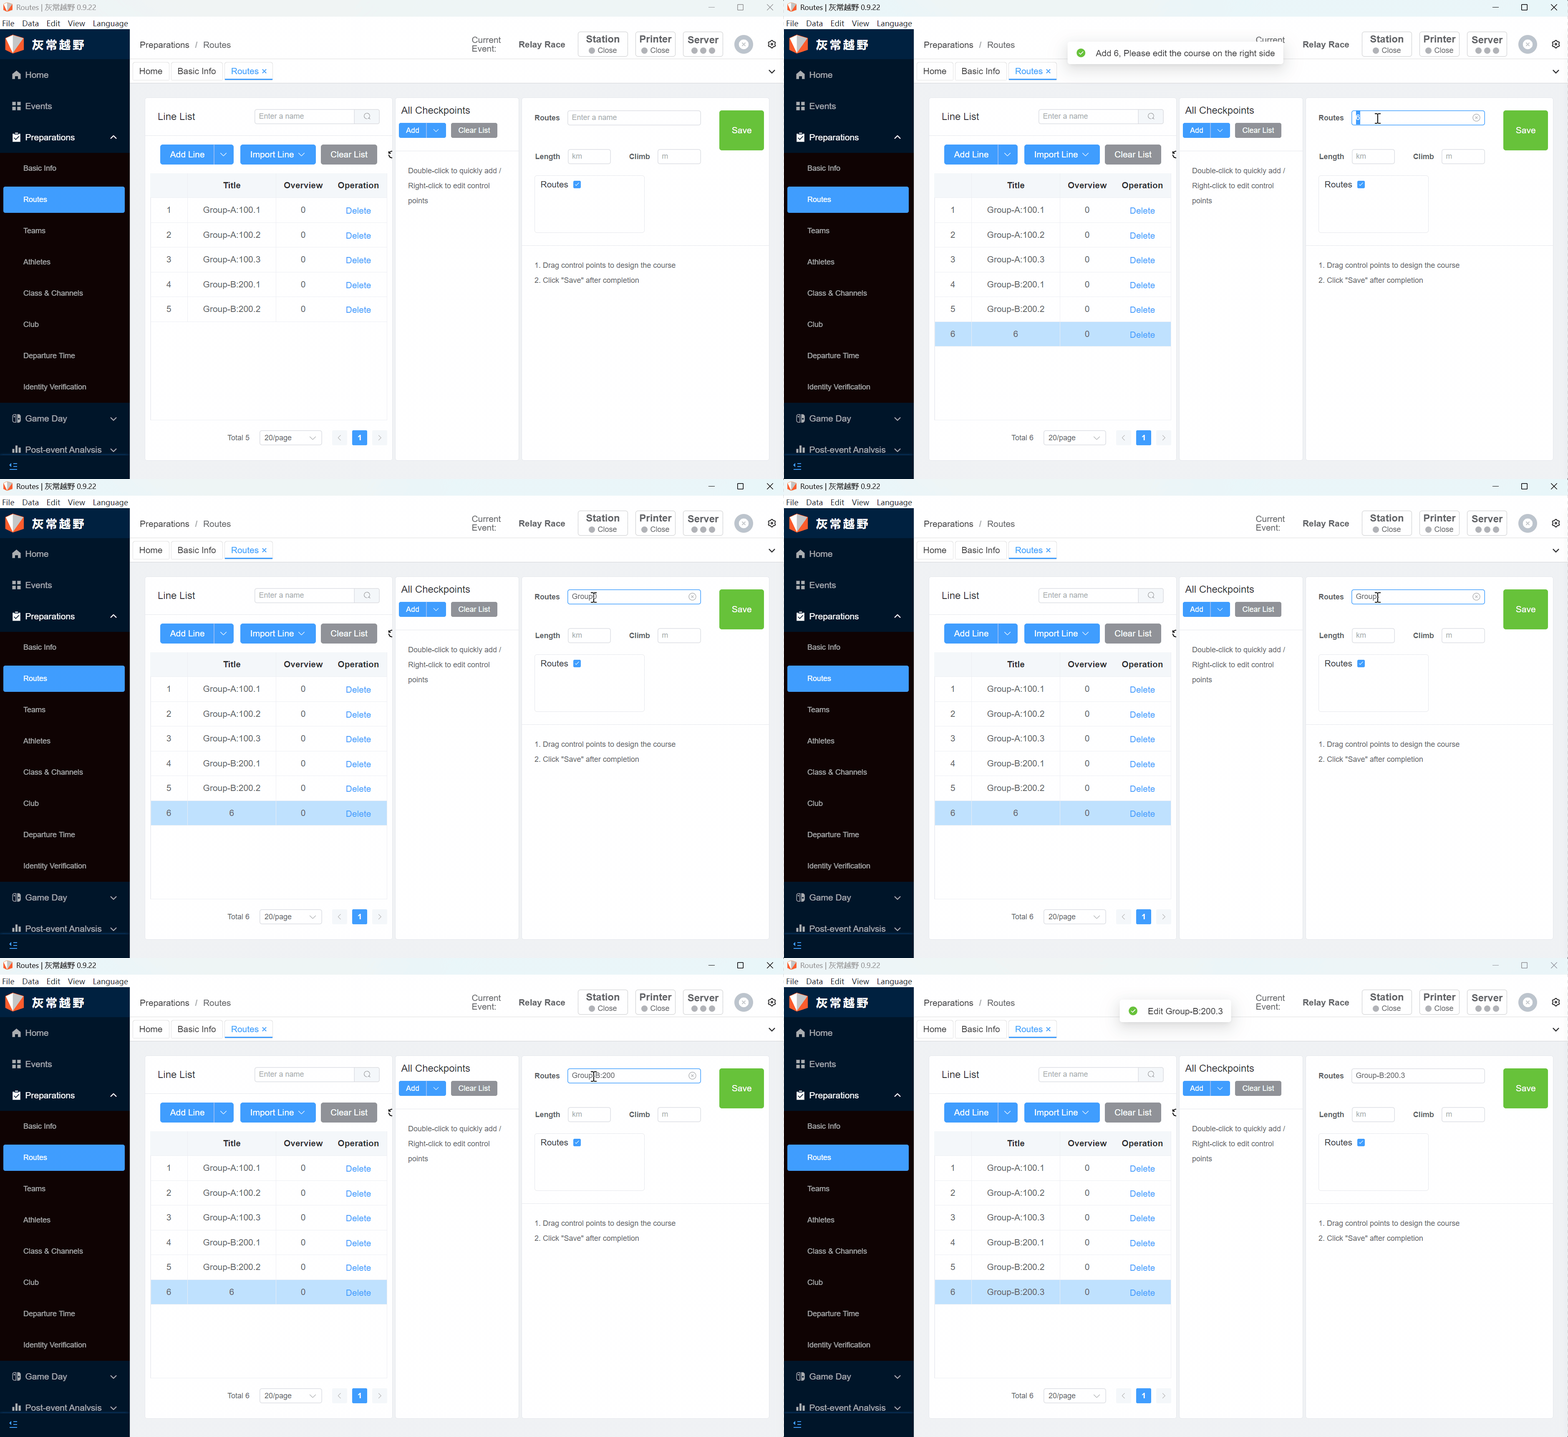
You can manually create routes. In the Route interface, select New Route, fill in the content of the new route, and complete the route creation.
2.1.2 Import Route
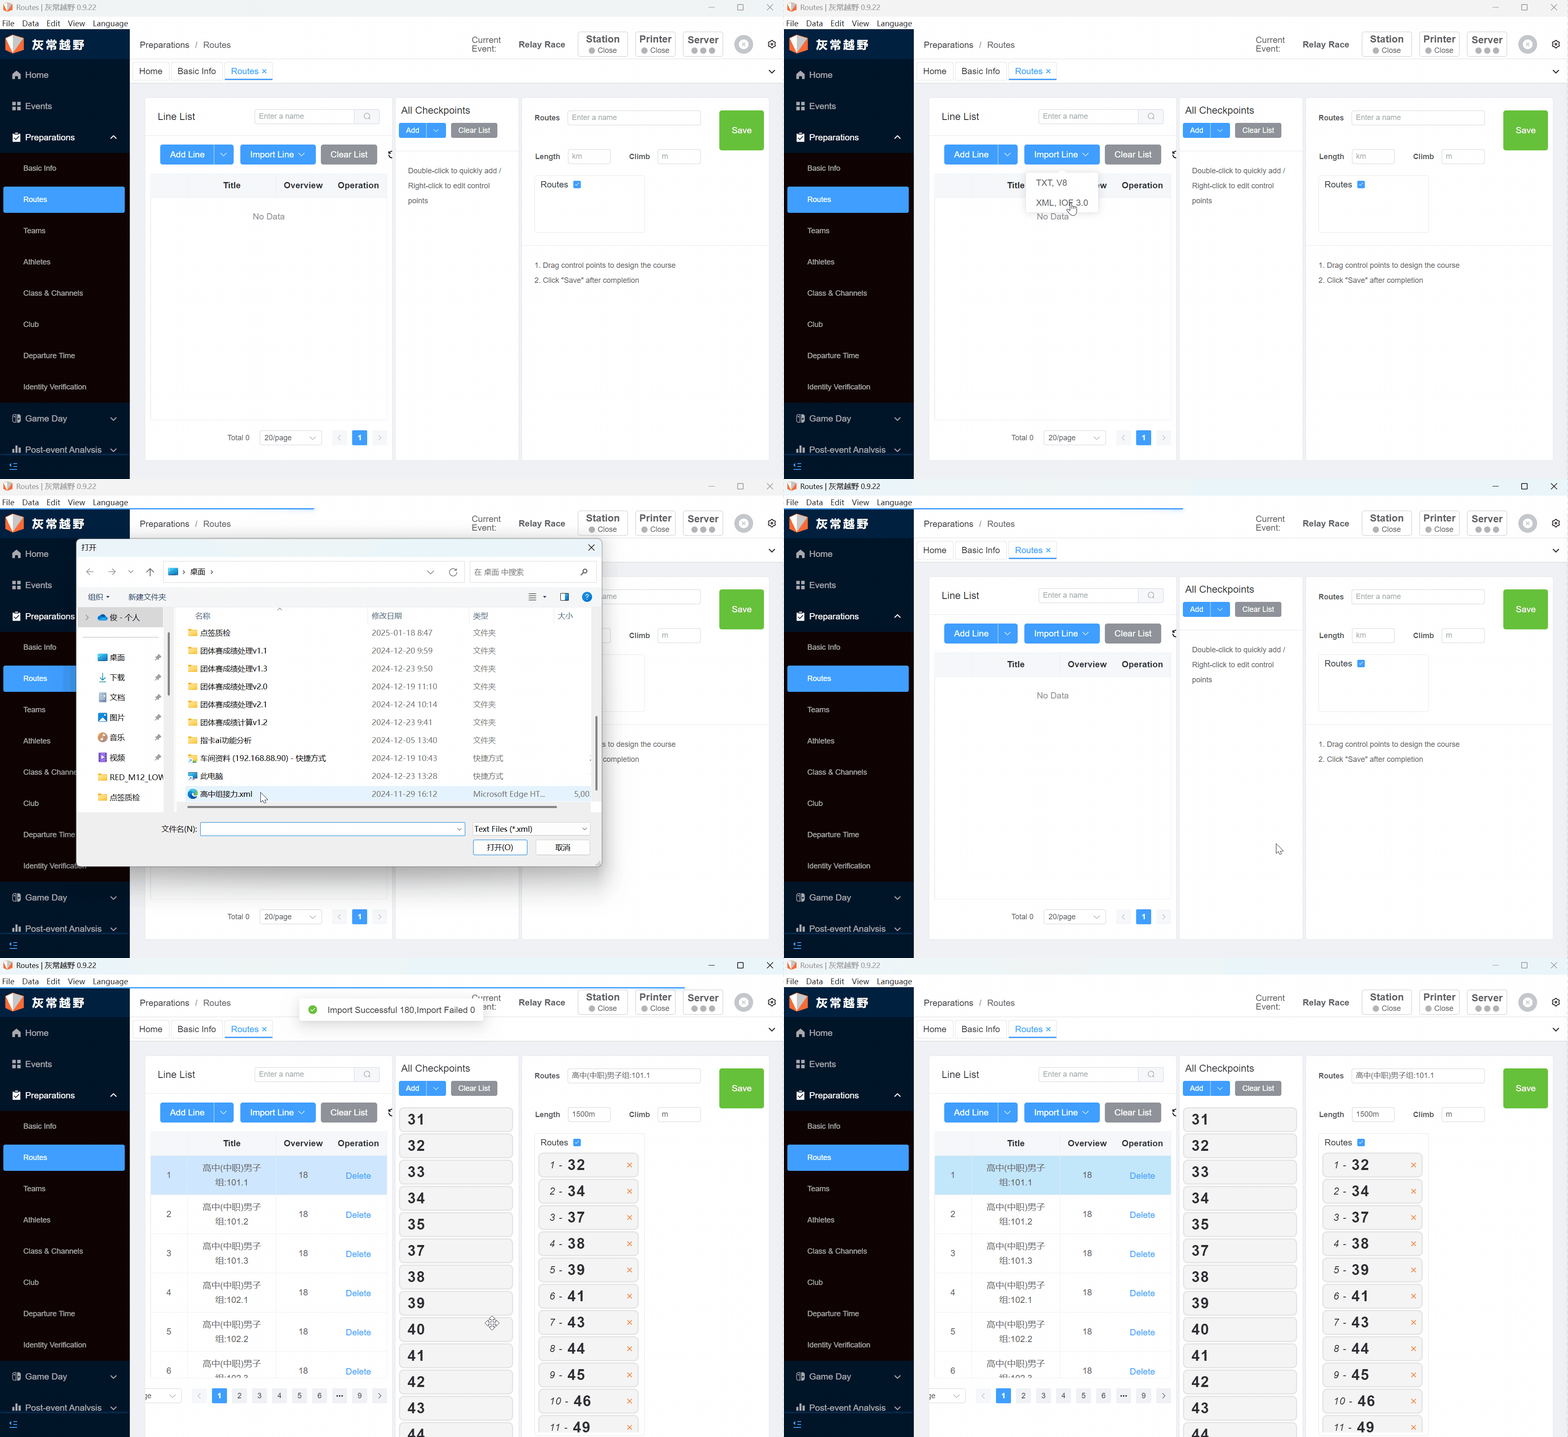
In the Route interface, select Import Route, and complete the route import. When importing routes, you can choose two types of files to import, TXT, V8 and XML, IOF 3.0.
2.2 Set Points
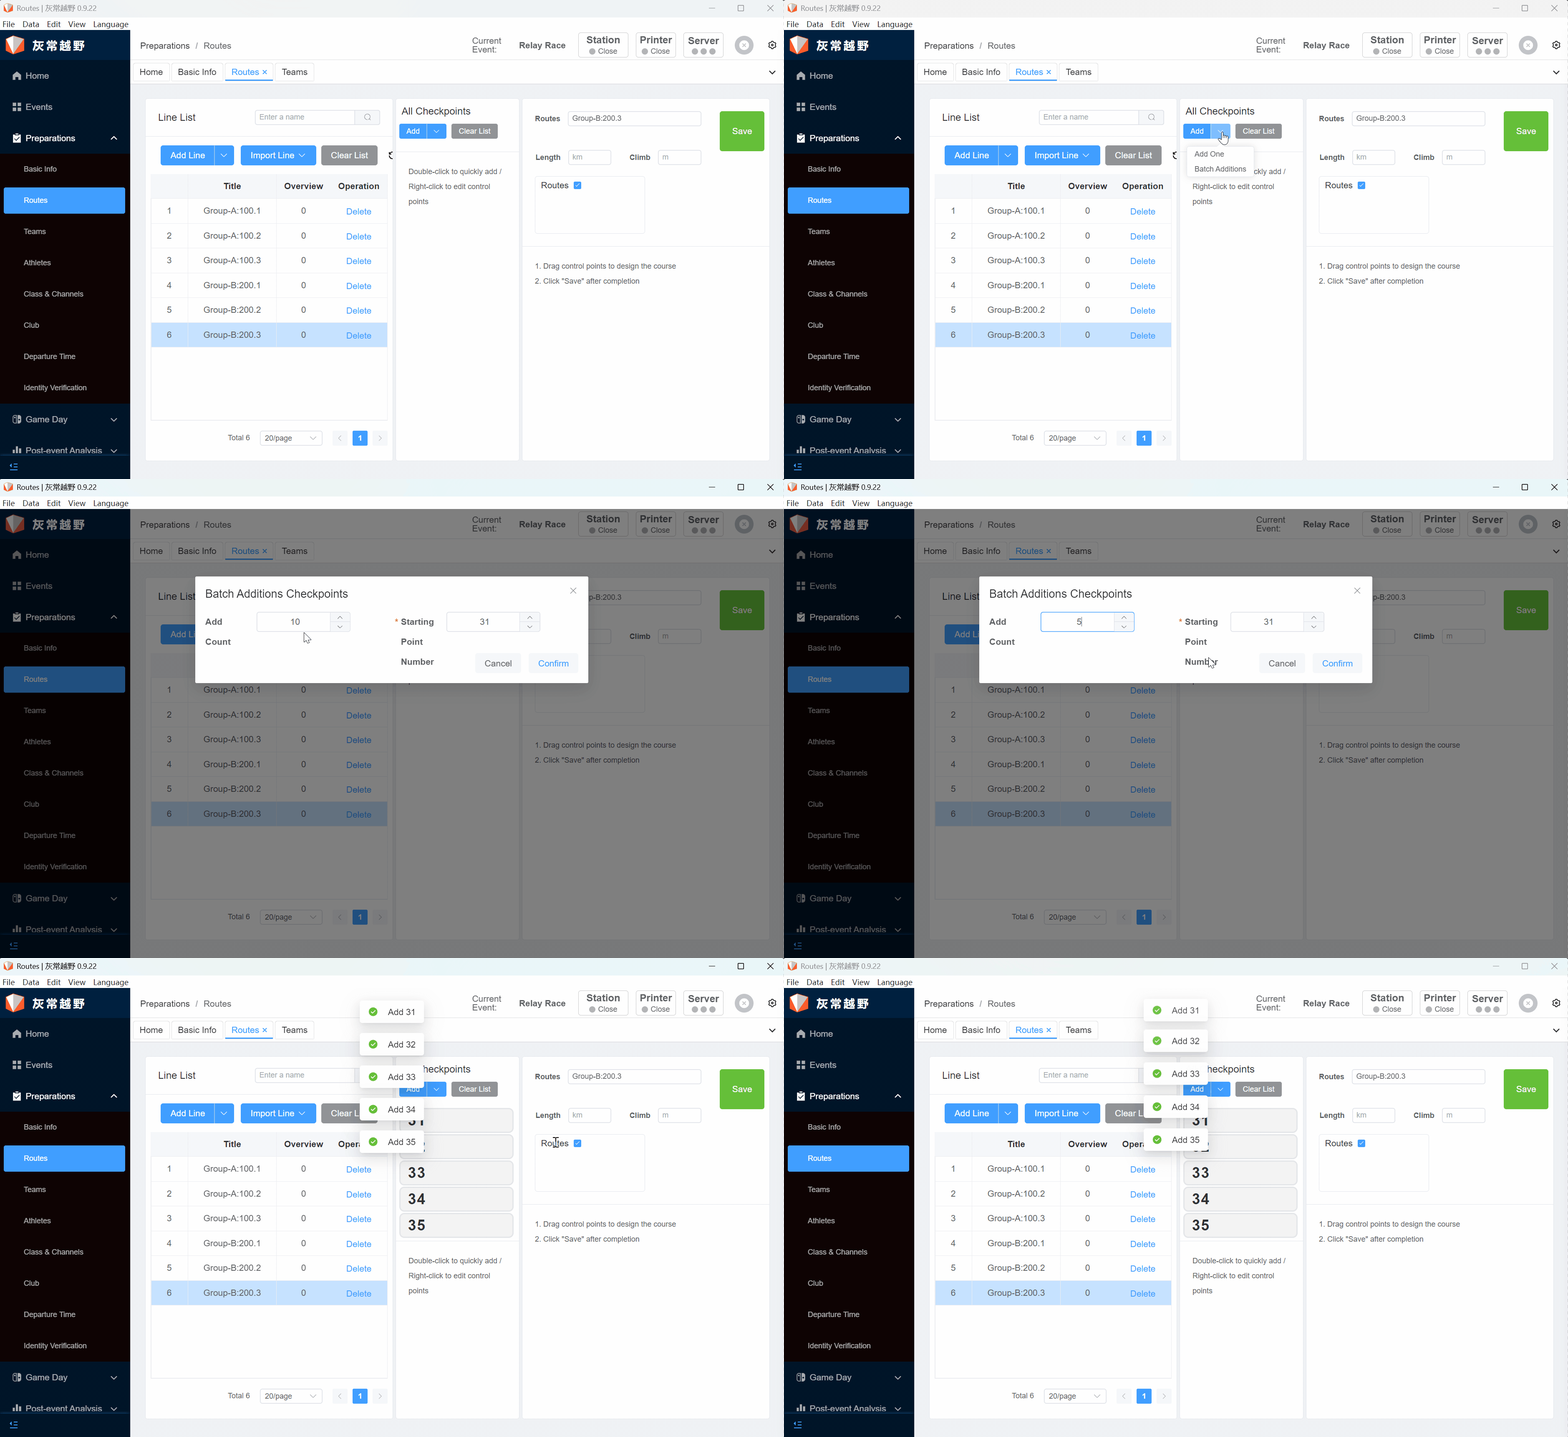
In the Route interface, select New dropdown, select Batch Add (multiple consecutive points) according to the number of points needed, click the Confirm button, and complete the point creation (if the points are far apart, manually add one).
2.3 Edit Route
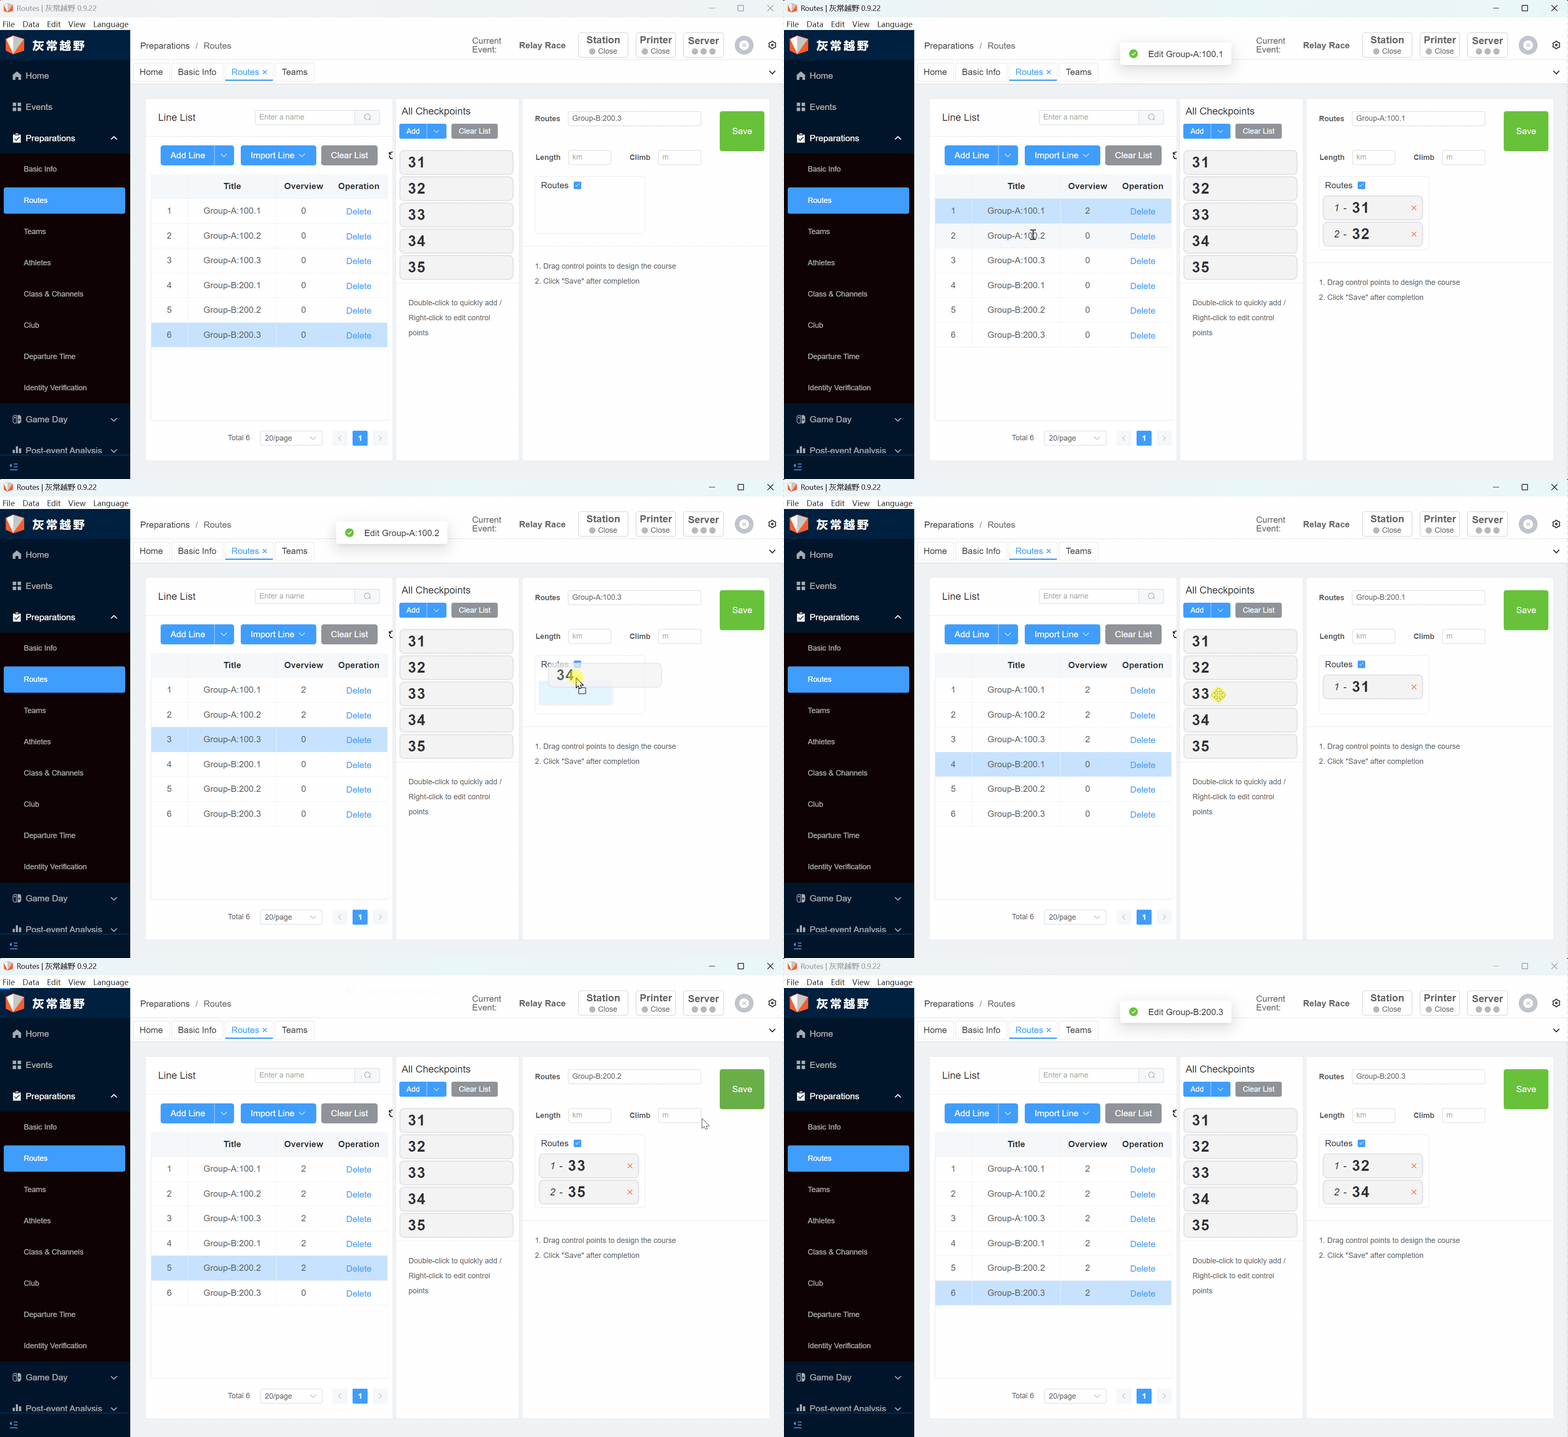
Edit the route for different groups according to the newly added points, and place the points in the route in the order of the actual competition route (Note: The point order cannot be reversed, and the route must be saved after the route is set).
Step 3: Team List
3.1 Export Template
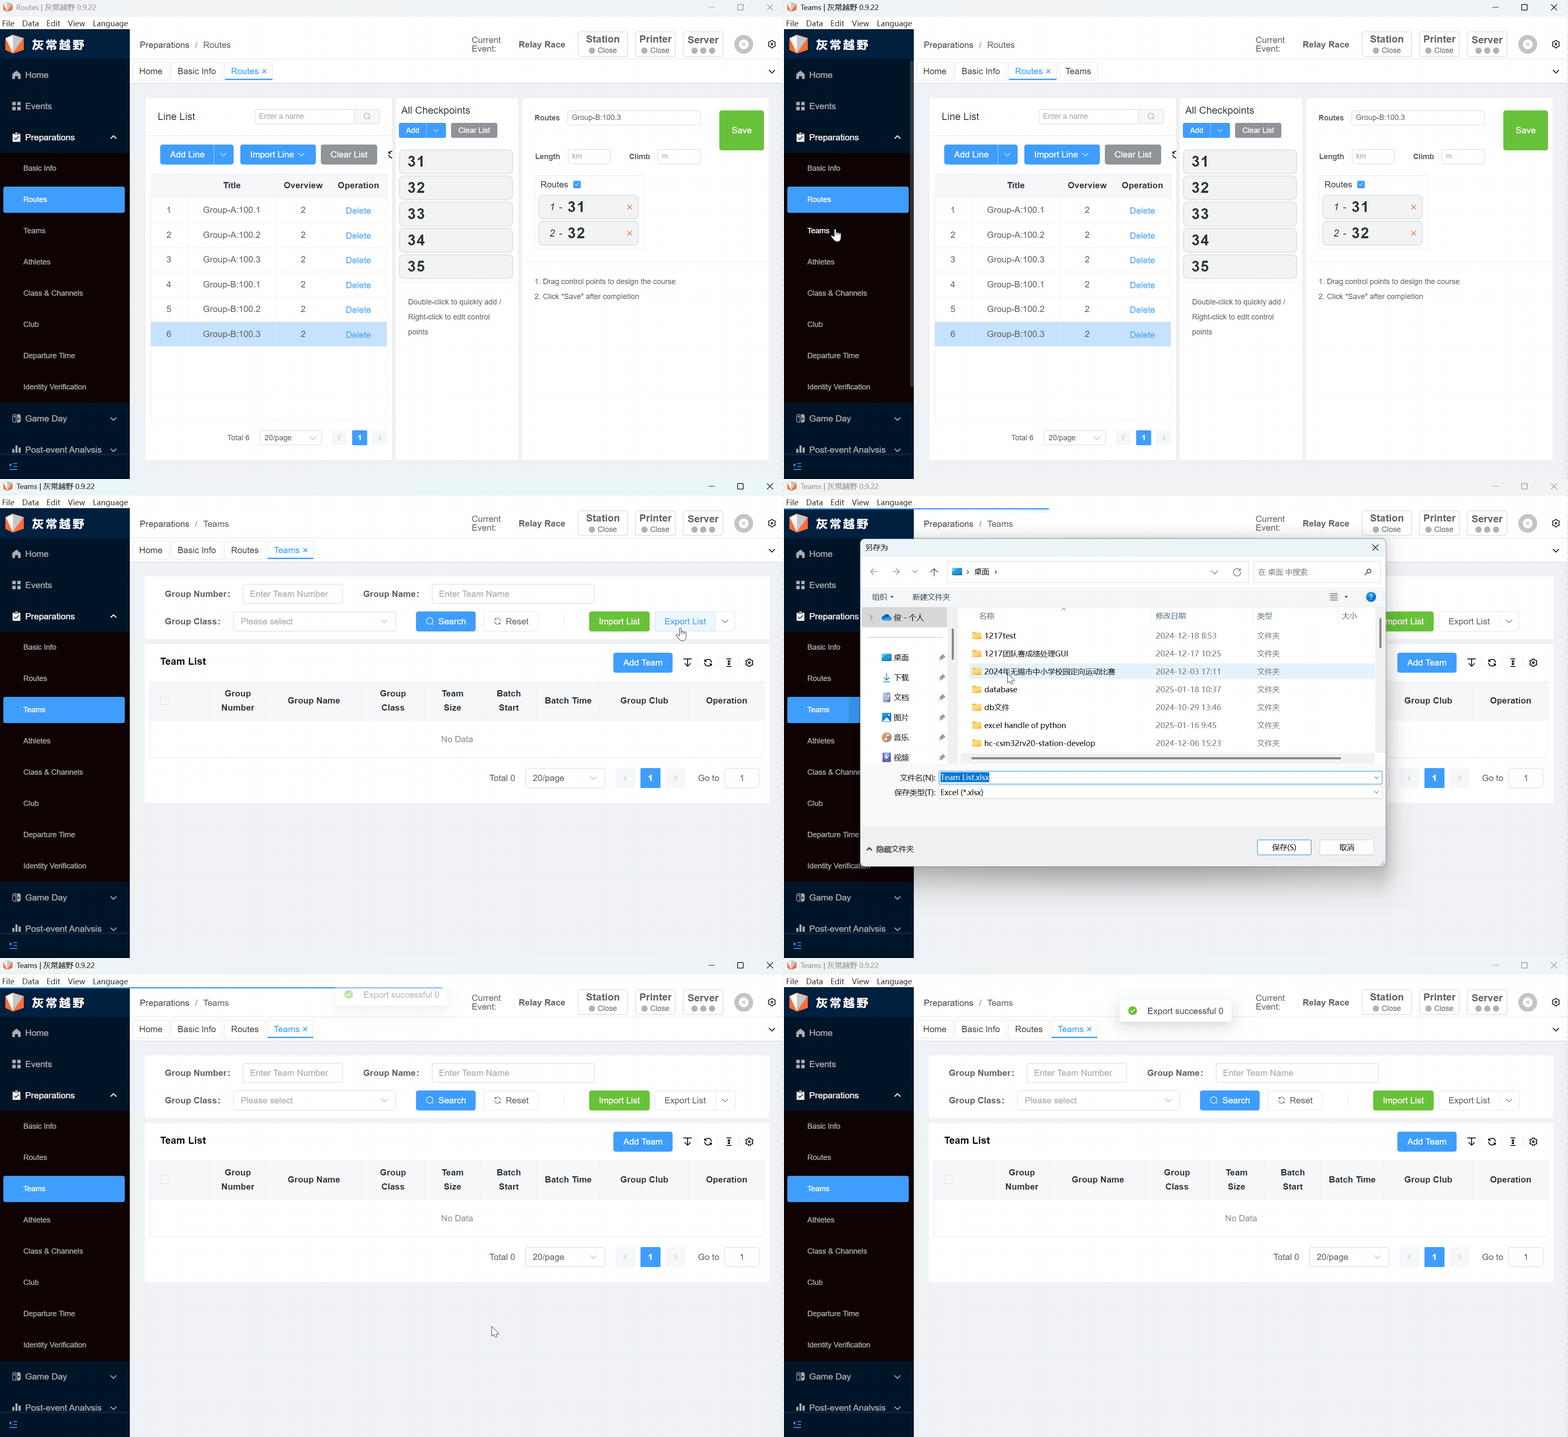
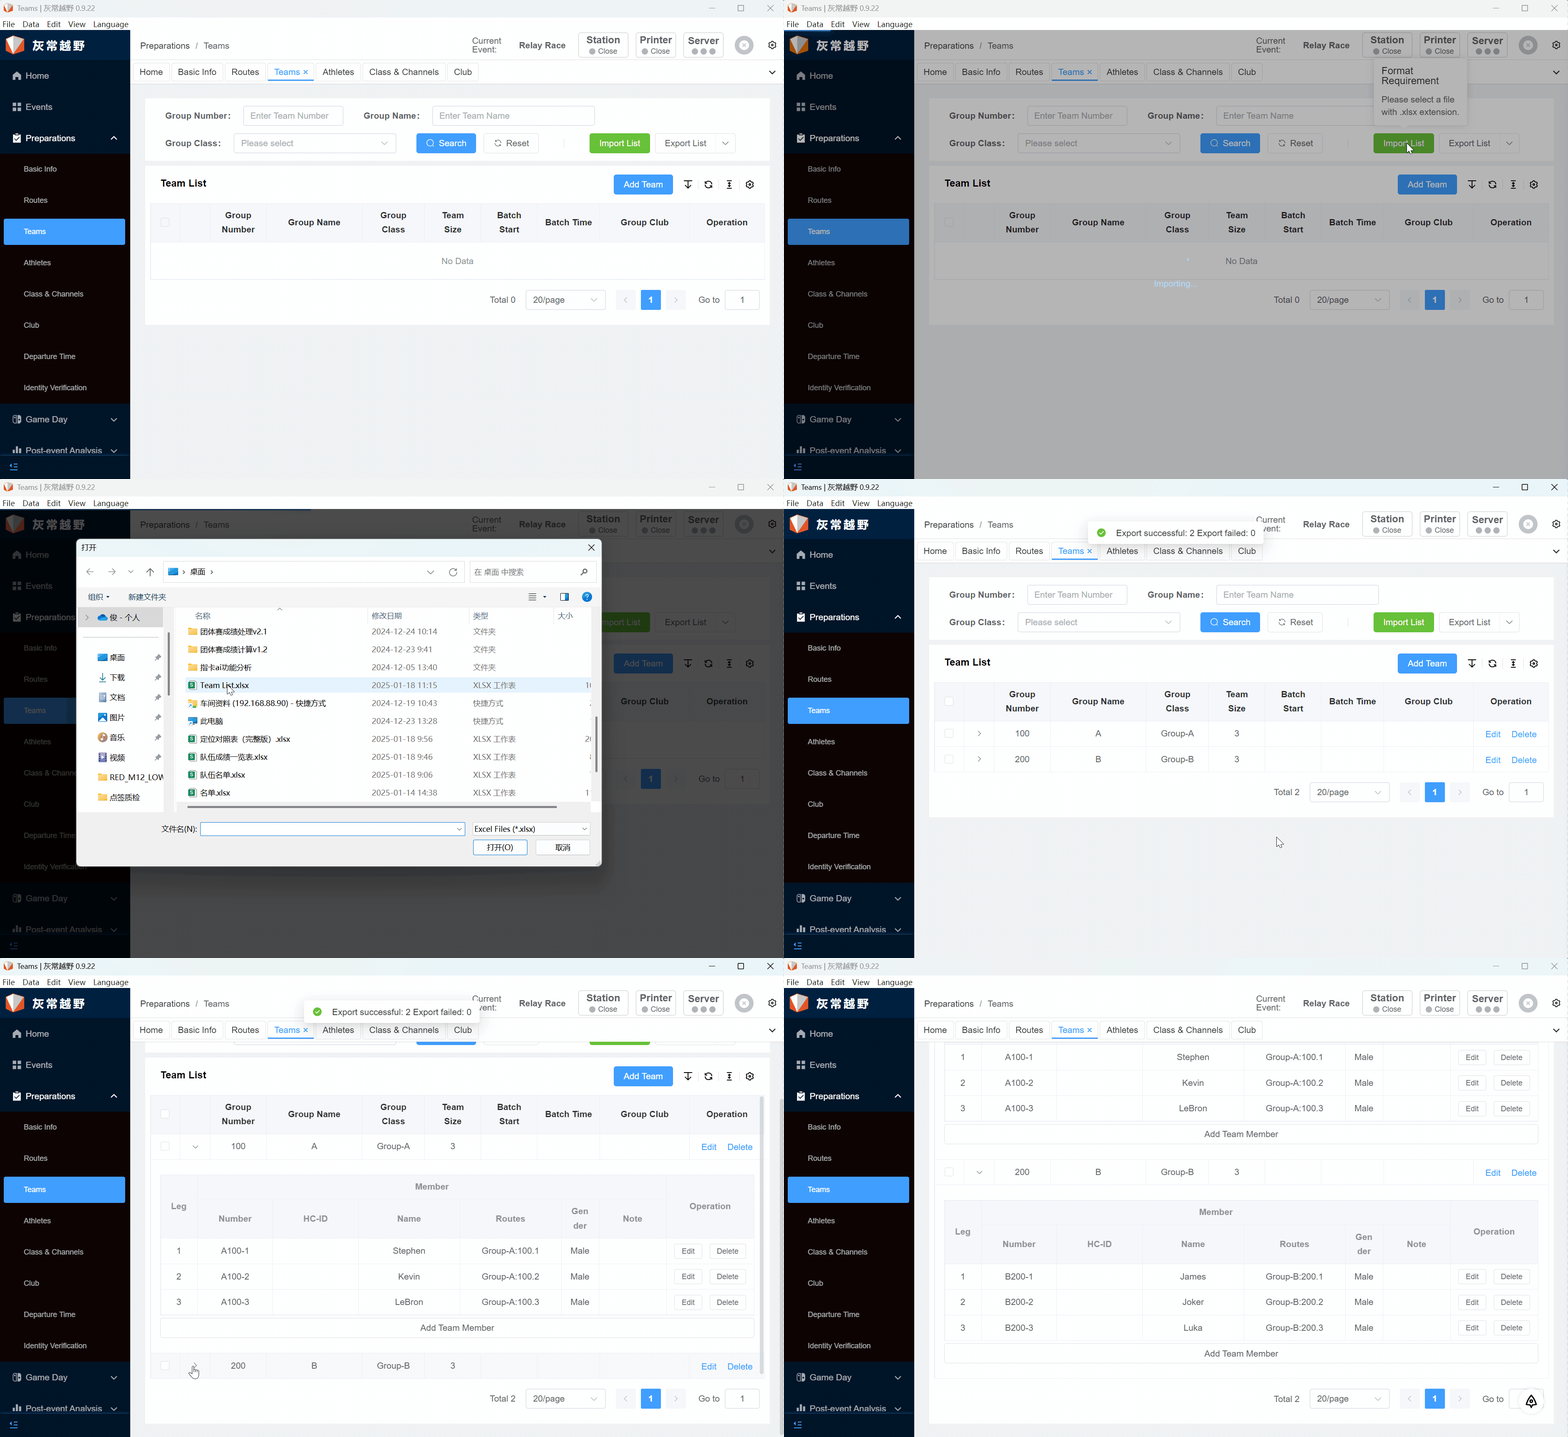
Click the Team column under the left menu bar, select Export List, and export the team list template (Do not delete the content inside the table, otherwise the list import will fail).
3.2 Fill in the List
The team list must be filled in with Team number, Team name, Participant number, Group name, Name, and Batting order; consistent with the route naming convention (Route naming convention: Group name: Team number. Batting order).

3.3 Import List
Click the Import List button to import the list, and the system will prompt the number of successful and failed imports (if there are failures, please check if the participant number is duplicated or if the list is missing).
3.4 Card Input
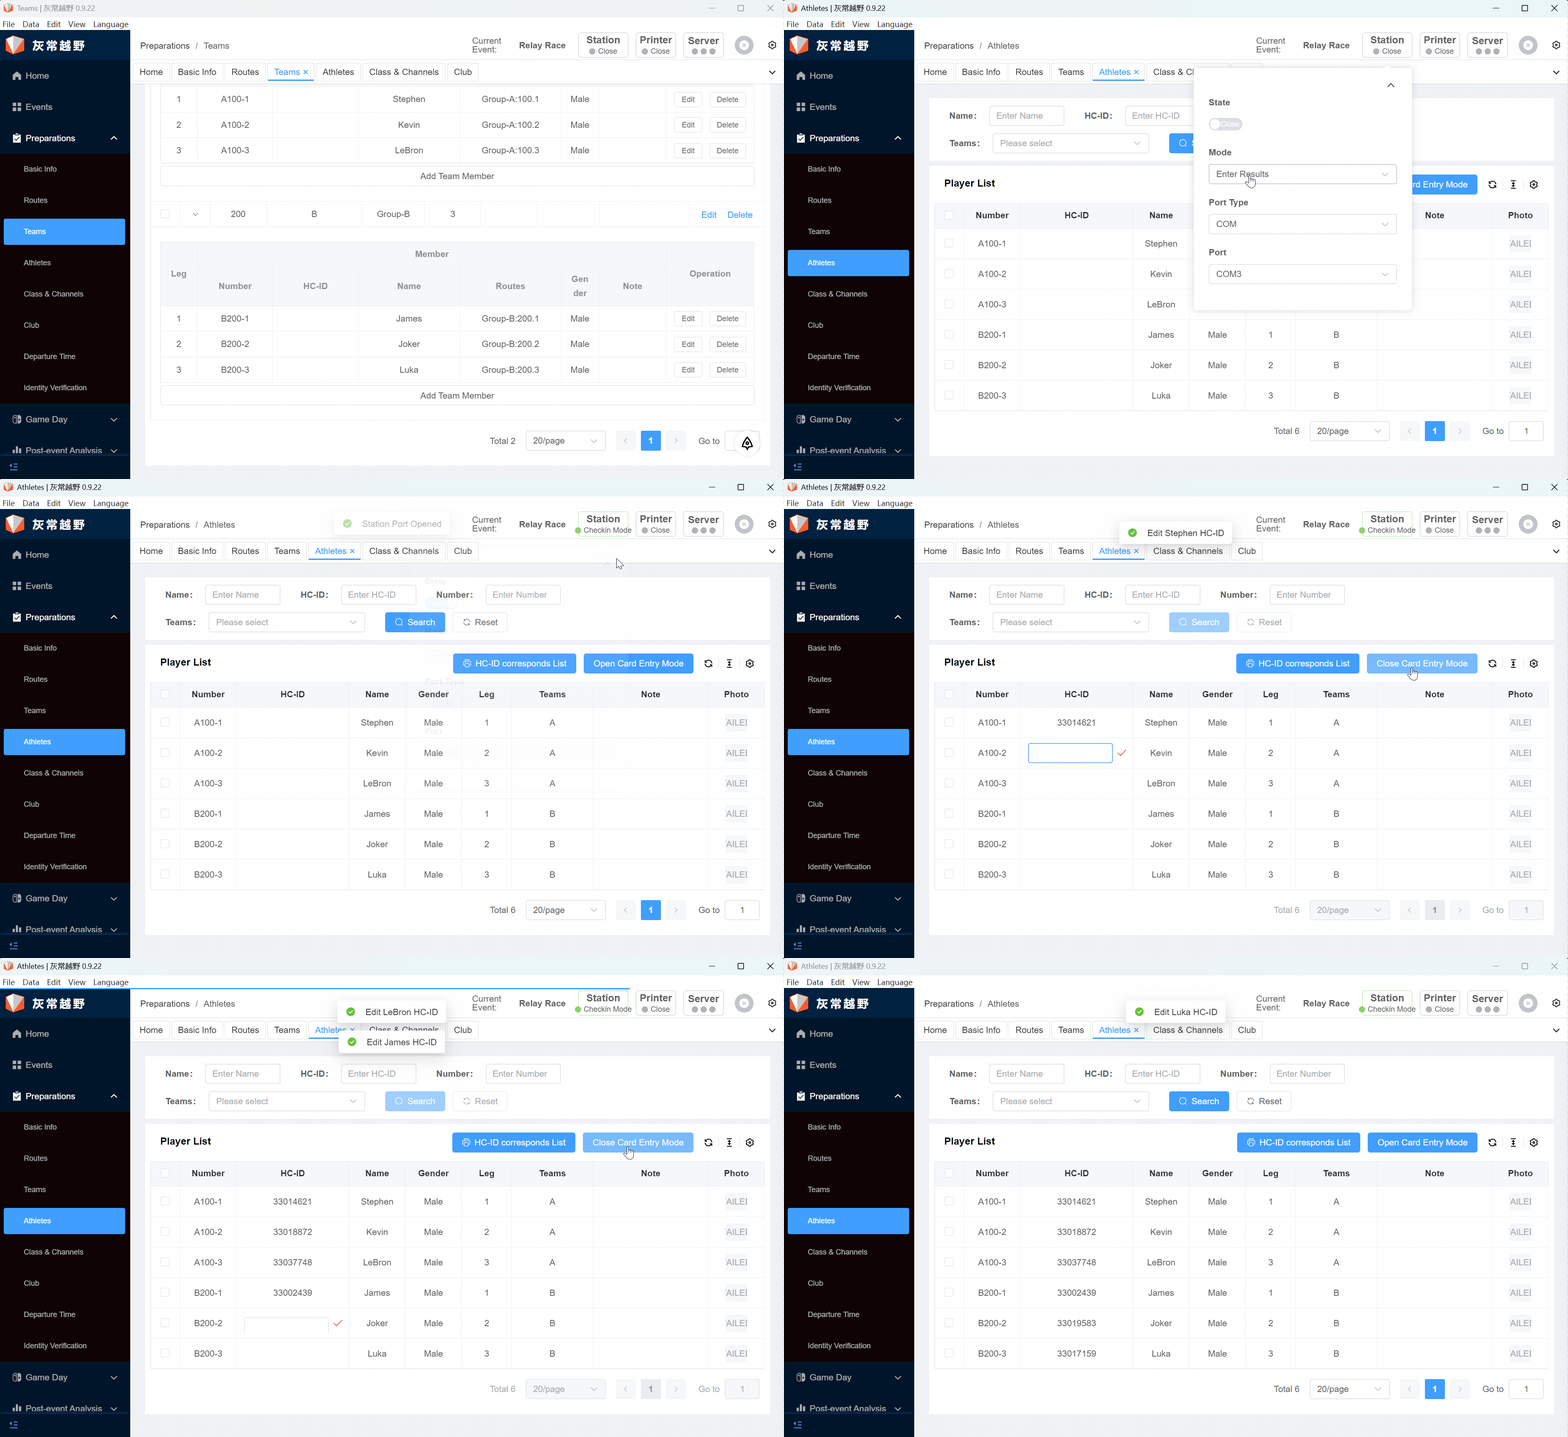
Before recording, please prepare the relevant hardware equipment: Main station, Main station line, and ensure that the main station line is connected to the main station normally (When the main station is connected normally, the main station will beep once, and the red light on the lower left corner will flash).
When recording, switch to the Athlete column, click the main station button of the software, switch to Check-in mode, select the correct serial port, click the Status button to open, if the connection with the software is normal, the main station will beep once, if not, it may be because the serial port is selected incorrectly, please reselect. Click the Open Card Recording Mode button, and then face the card towards the main station, contact the main station, and the card number can be recorded.
Step 4: Group & Channel
4.1 Match Route and Channel
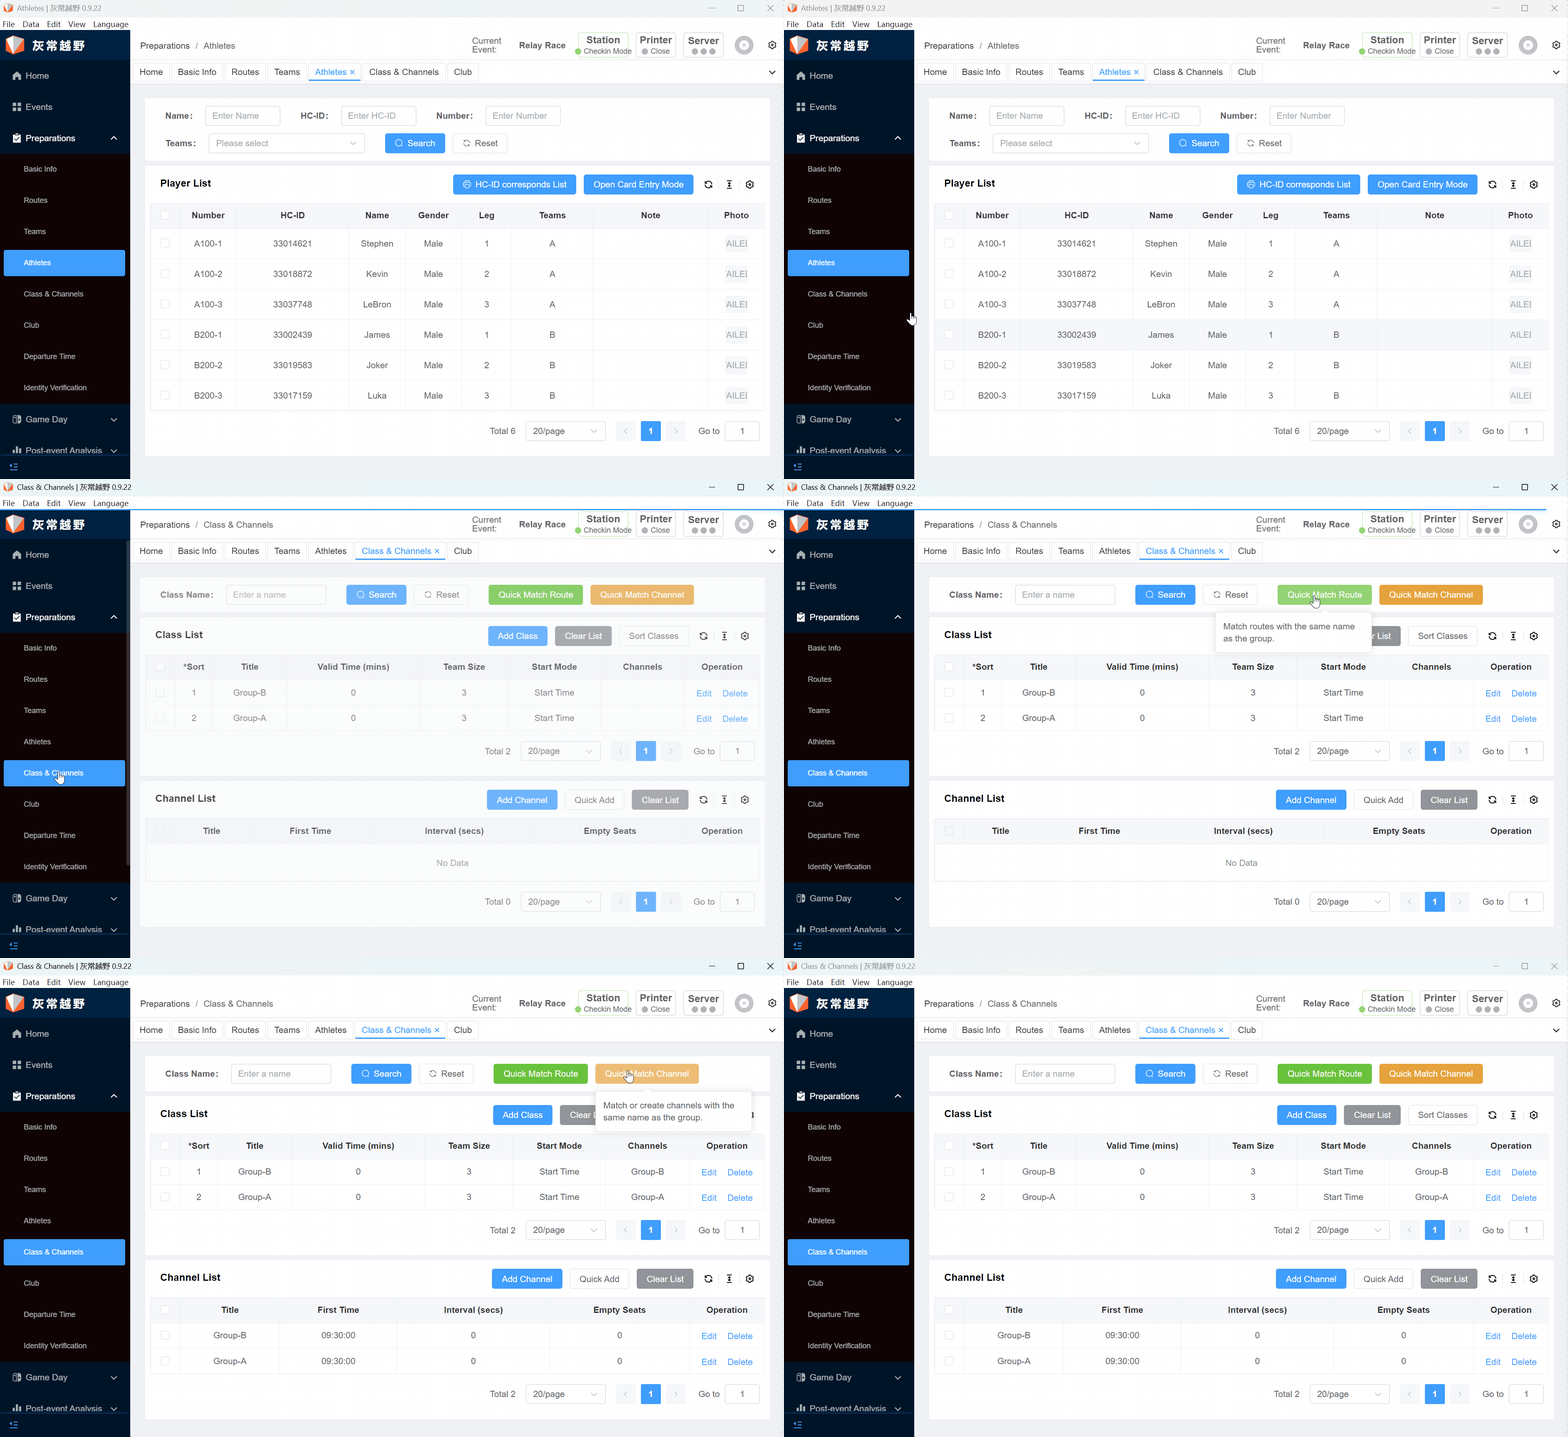
In the Group & Channel interface, click the Quick Match Route button and the Quick Match Channel button, Quick Match Route matches the route with the same name as the group automatically, and Quick Match Channel matches or creates a channel with the same name as the group.
4.2 Edit Channel
Note
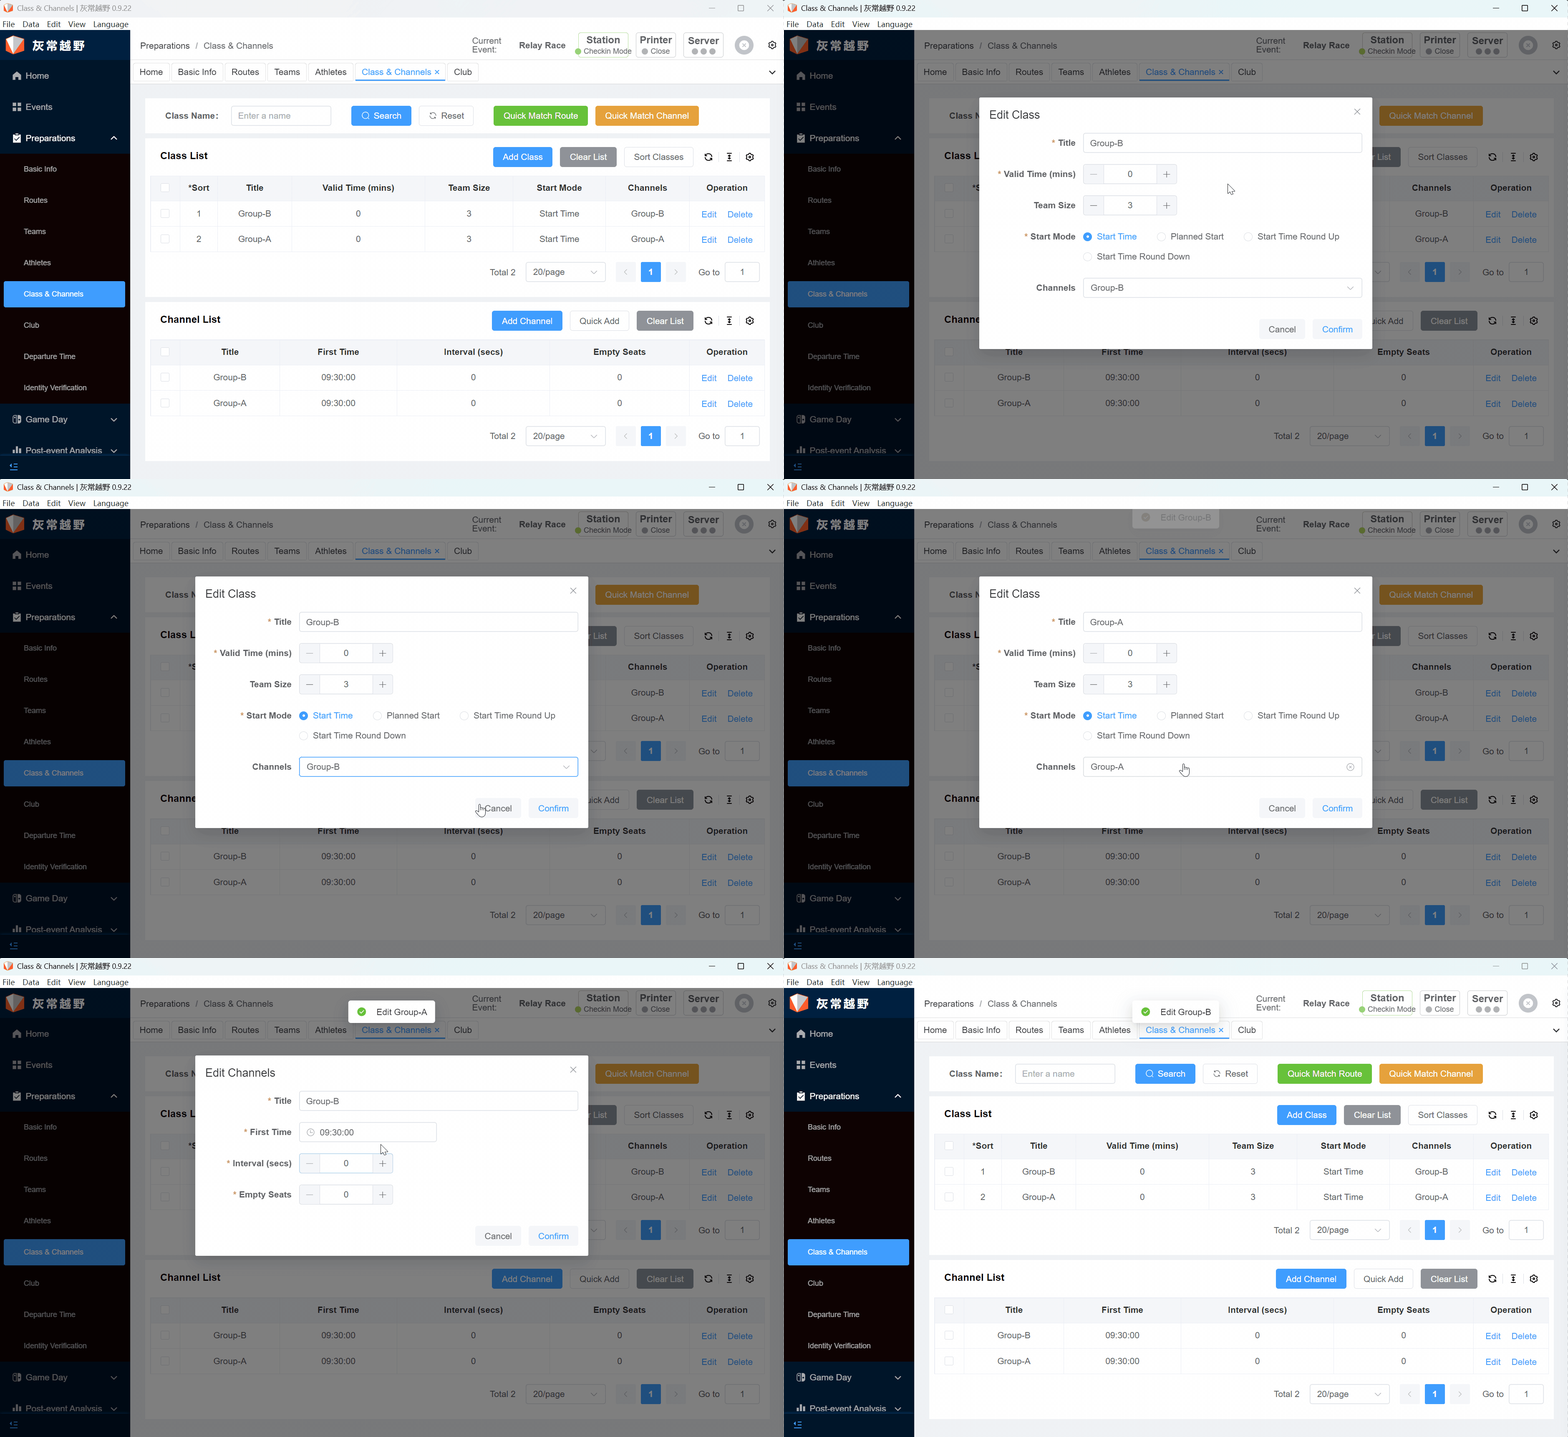
After clicking the Quick Match Route and Quick Match Channel buttons, please check whether the Name, Group, and Channel match. If they do not match, manually edit and modify.
Step 5: Real-Time Score
5.1 Recording Preparation
Hardware equipment: Main station, Main station line, and Printer (need to be turned on).
In the left menu bar, select the Real-Time Score column under the Competition Day column, select Score Input under the Main station button, select the correct serial port, click the Status button to open, When the connection with the main station is normal, the main station will beep once, and the red light on the lower left corner will flash, Printer connection success will have Printer connection success prompt.
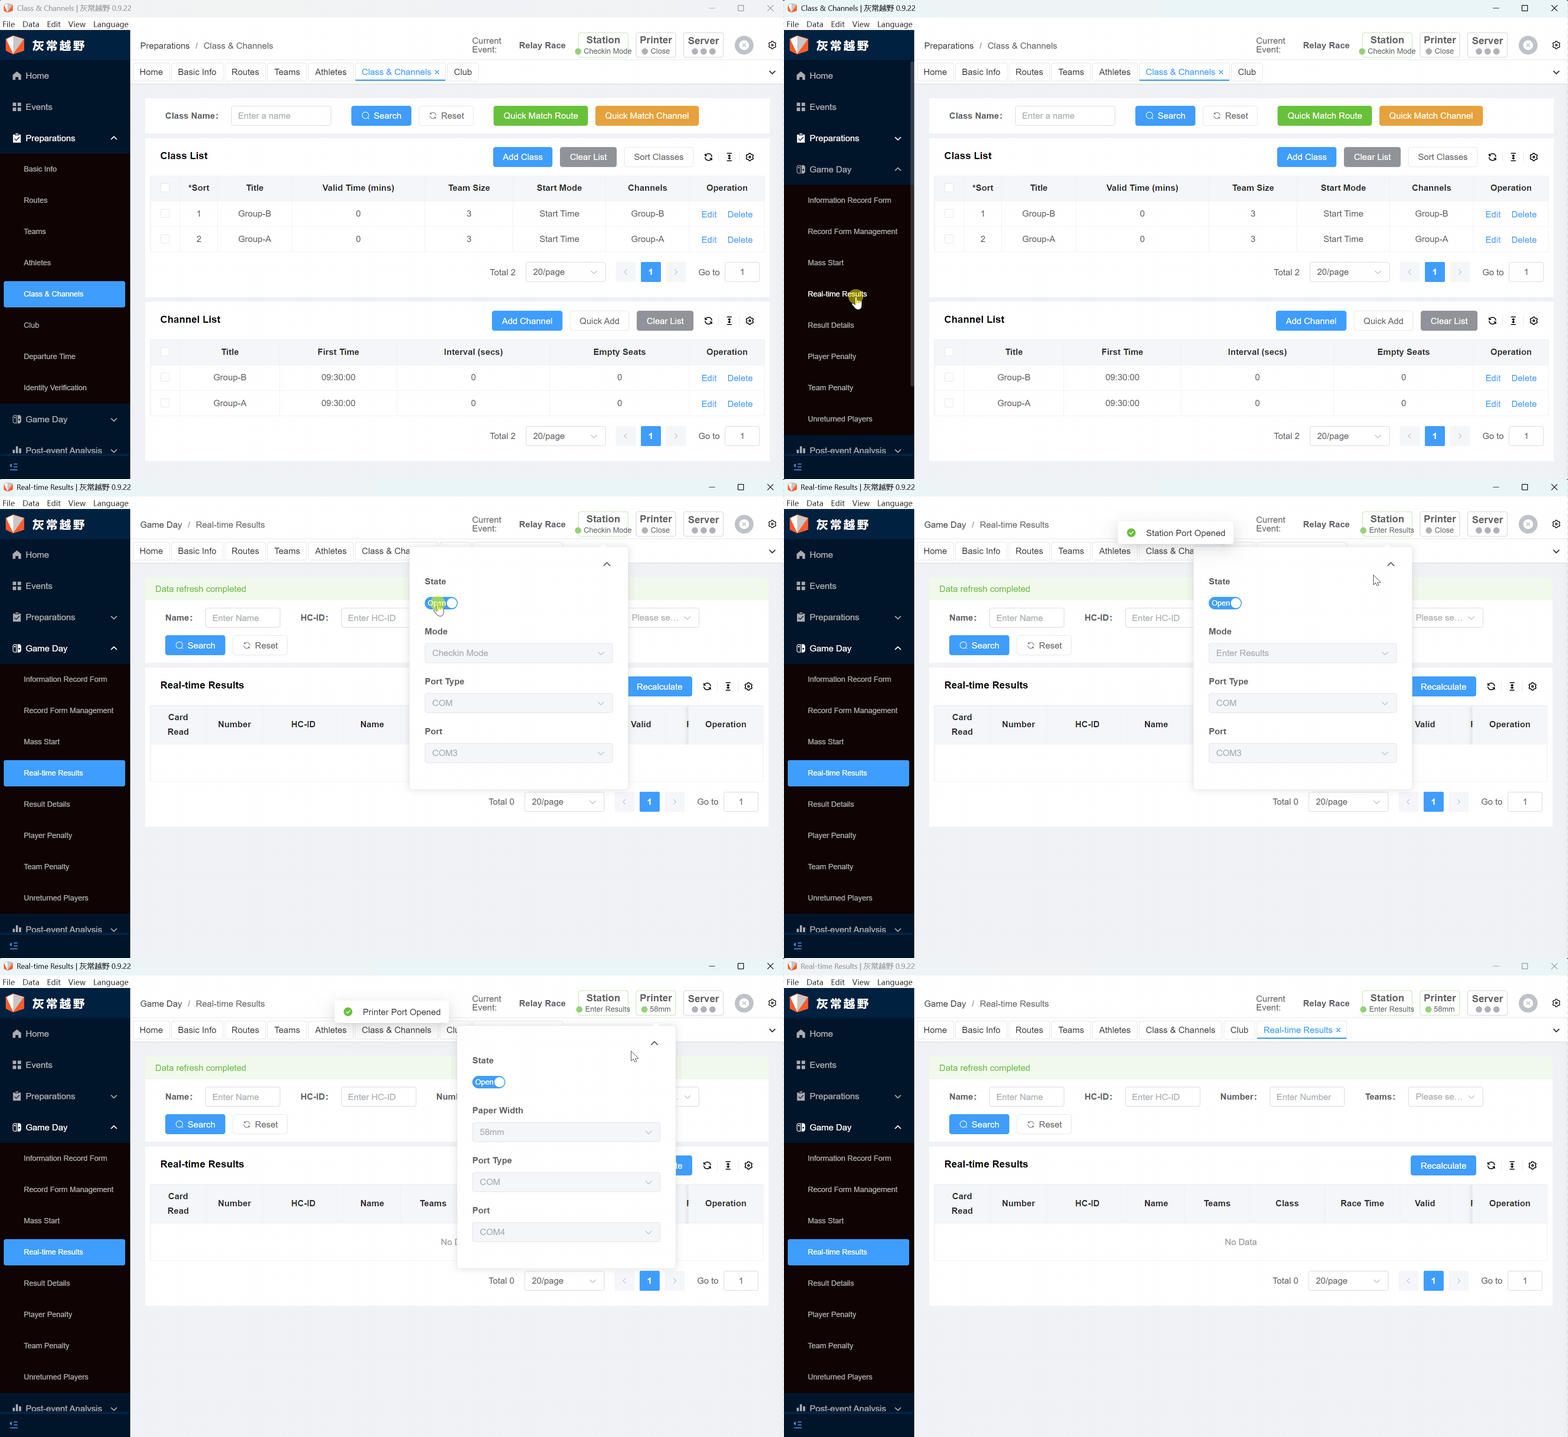
5.2 Score Input
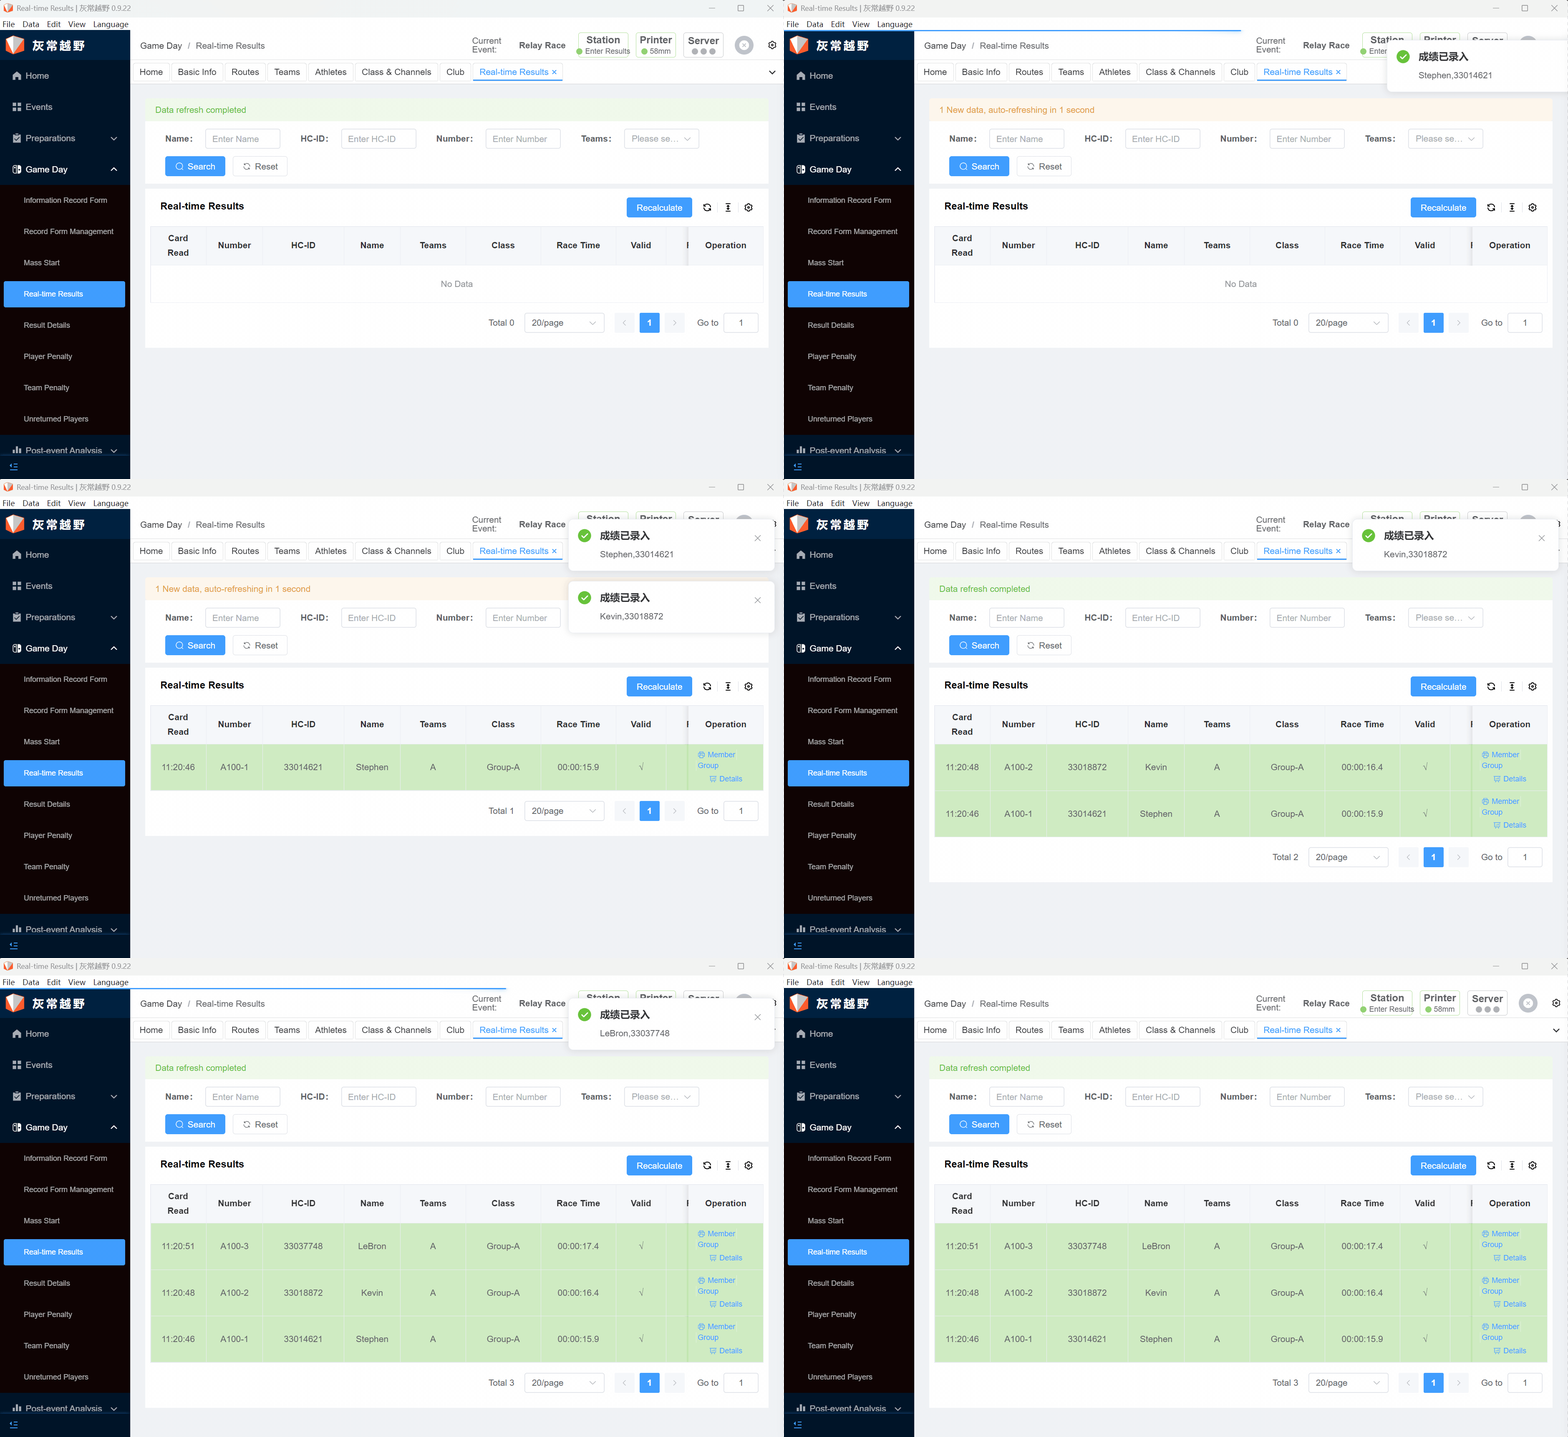
After the preparation work is completed, wait for the athletes to complete the points, and then go to the Score printing area (Main station placement location), face the card towards the main station, contact the main station, and the score can be recorded.
Step 6: No Return
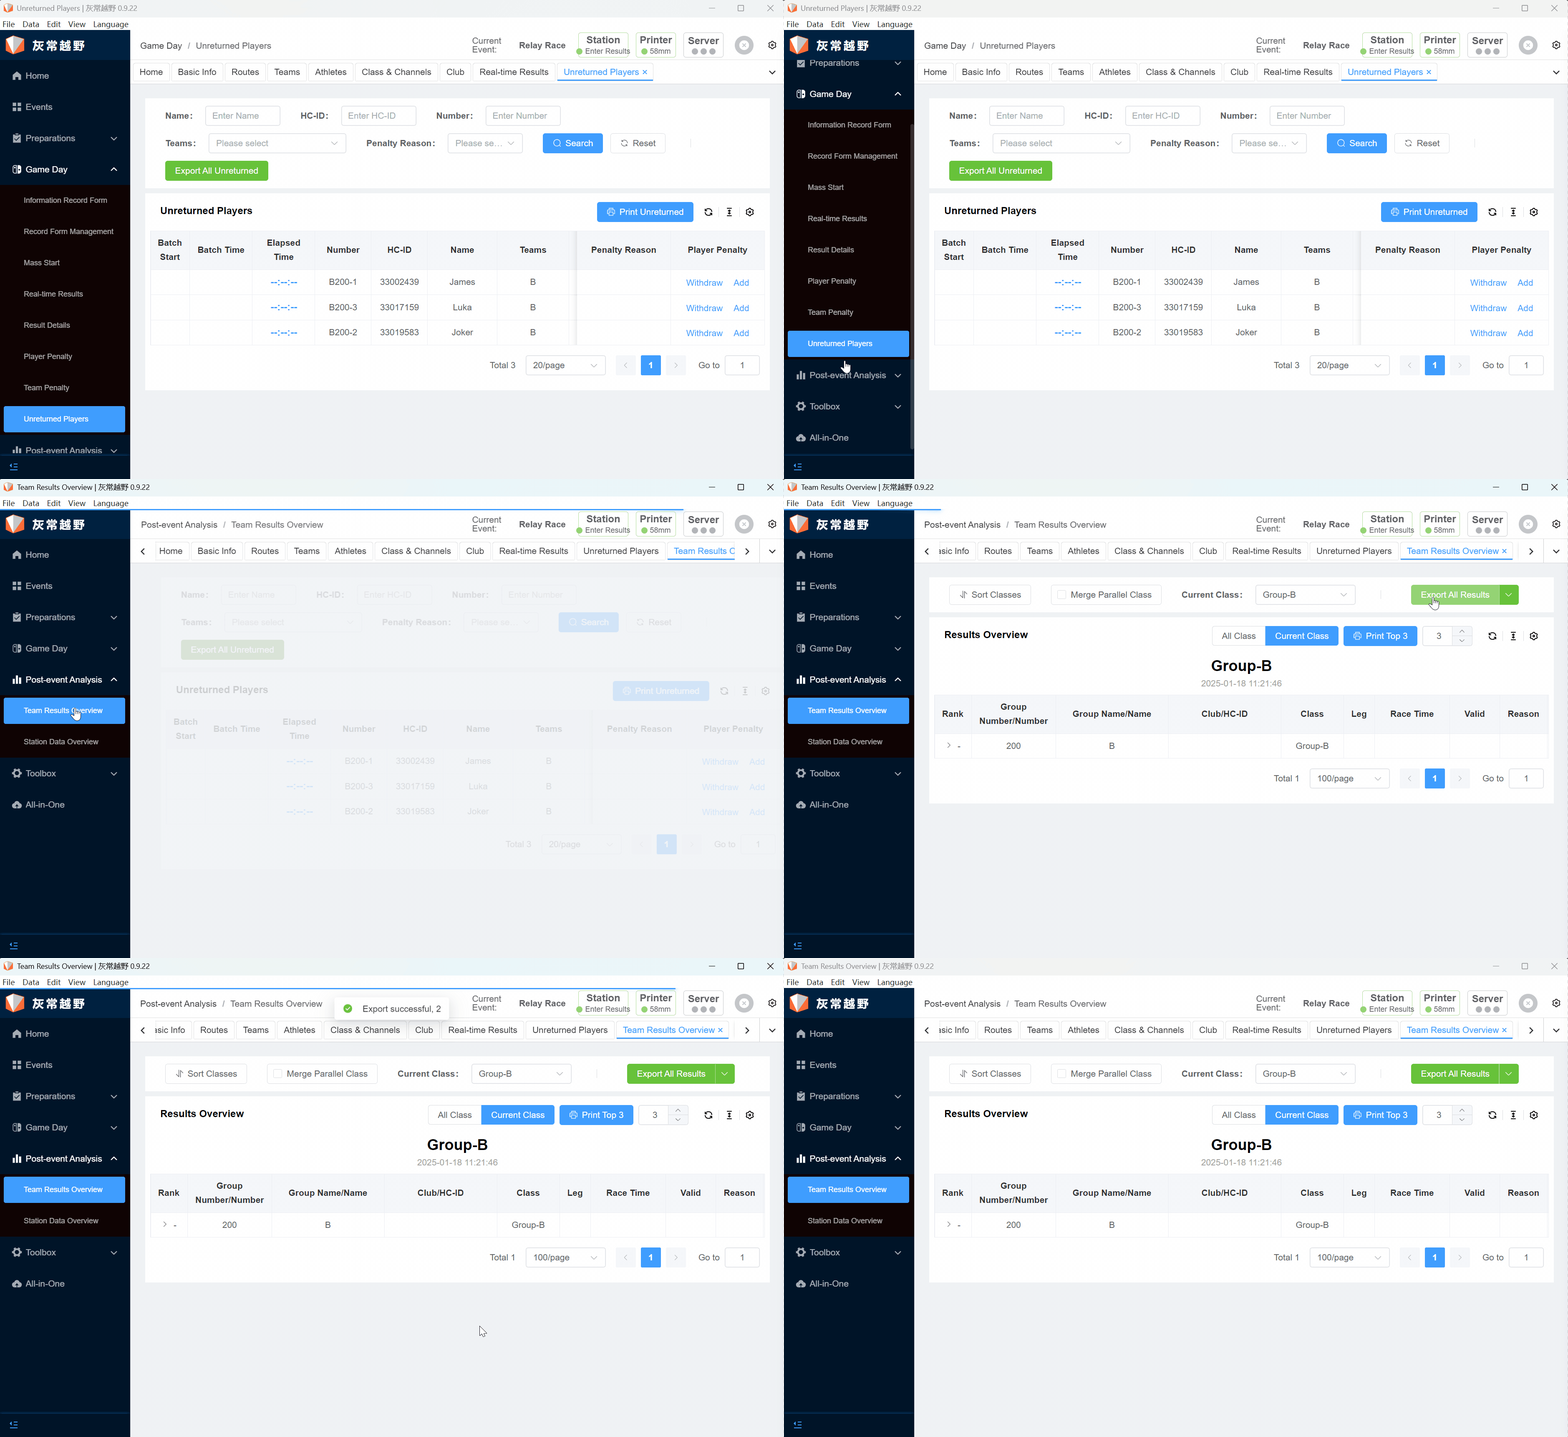
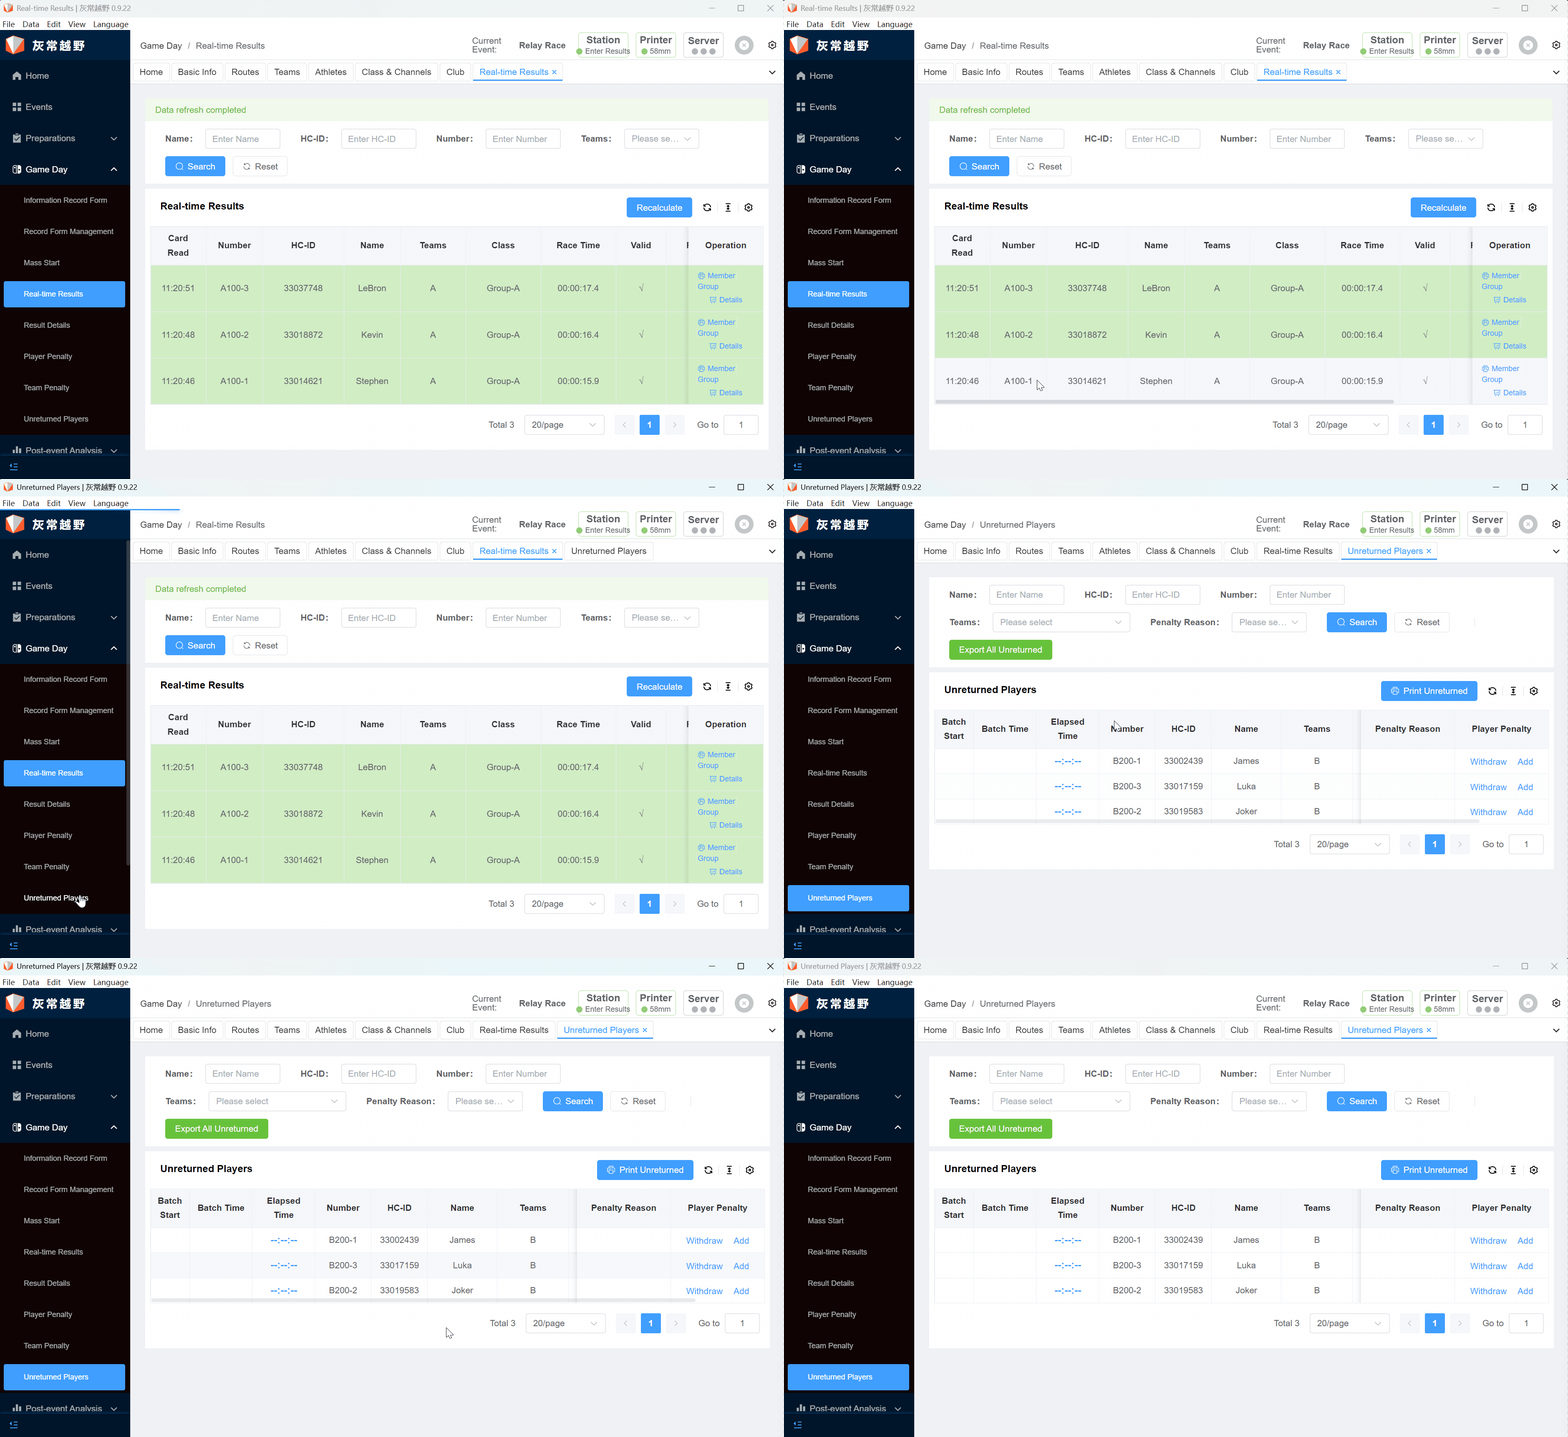
Click the No Return Athlete button under the Competition Day column to view the athletes who have not returned.
Step 7: Export Score
Select Score List under the Post-Competition Analysis column, click the Export All Scores button, and obtain the score details of all groups.
