Individual Race Guide
This page helps users quickly and independently create individual races. Through clear and concise steps and a straightforward operational process, users can easily set up events, groups, and routes, achieving efficient race management. This page can help you get started quickly and ensure the smooth running of the event.
First Step: Create Event
Enter the Chengtong software, click the left menu bar Event column, select New Event, fill in the event content, and complete the event creation. Click the Open button to enter the event. 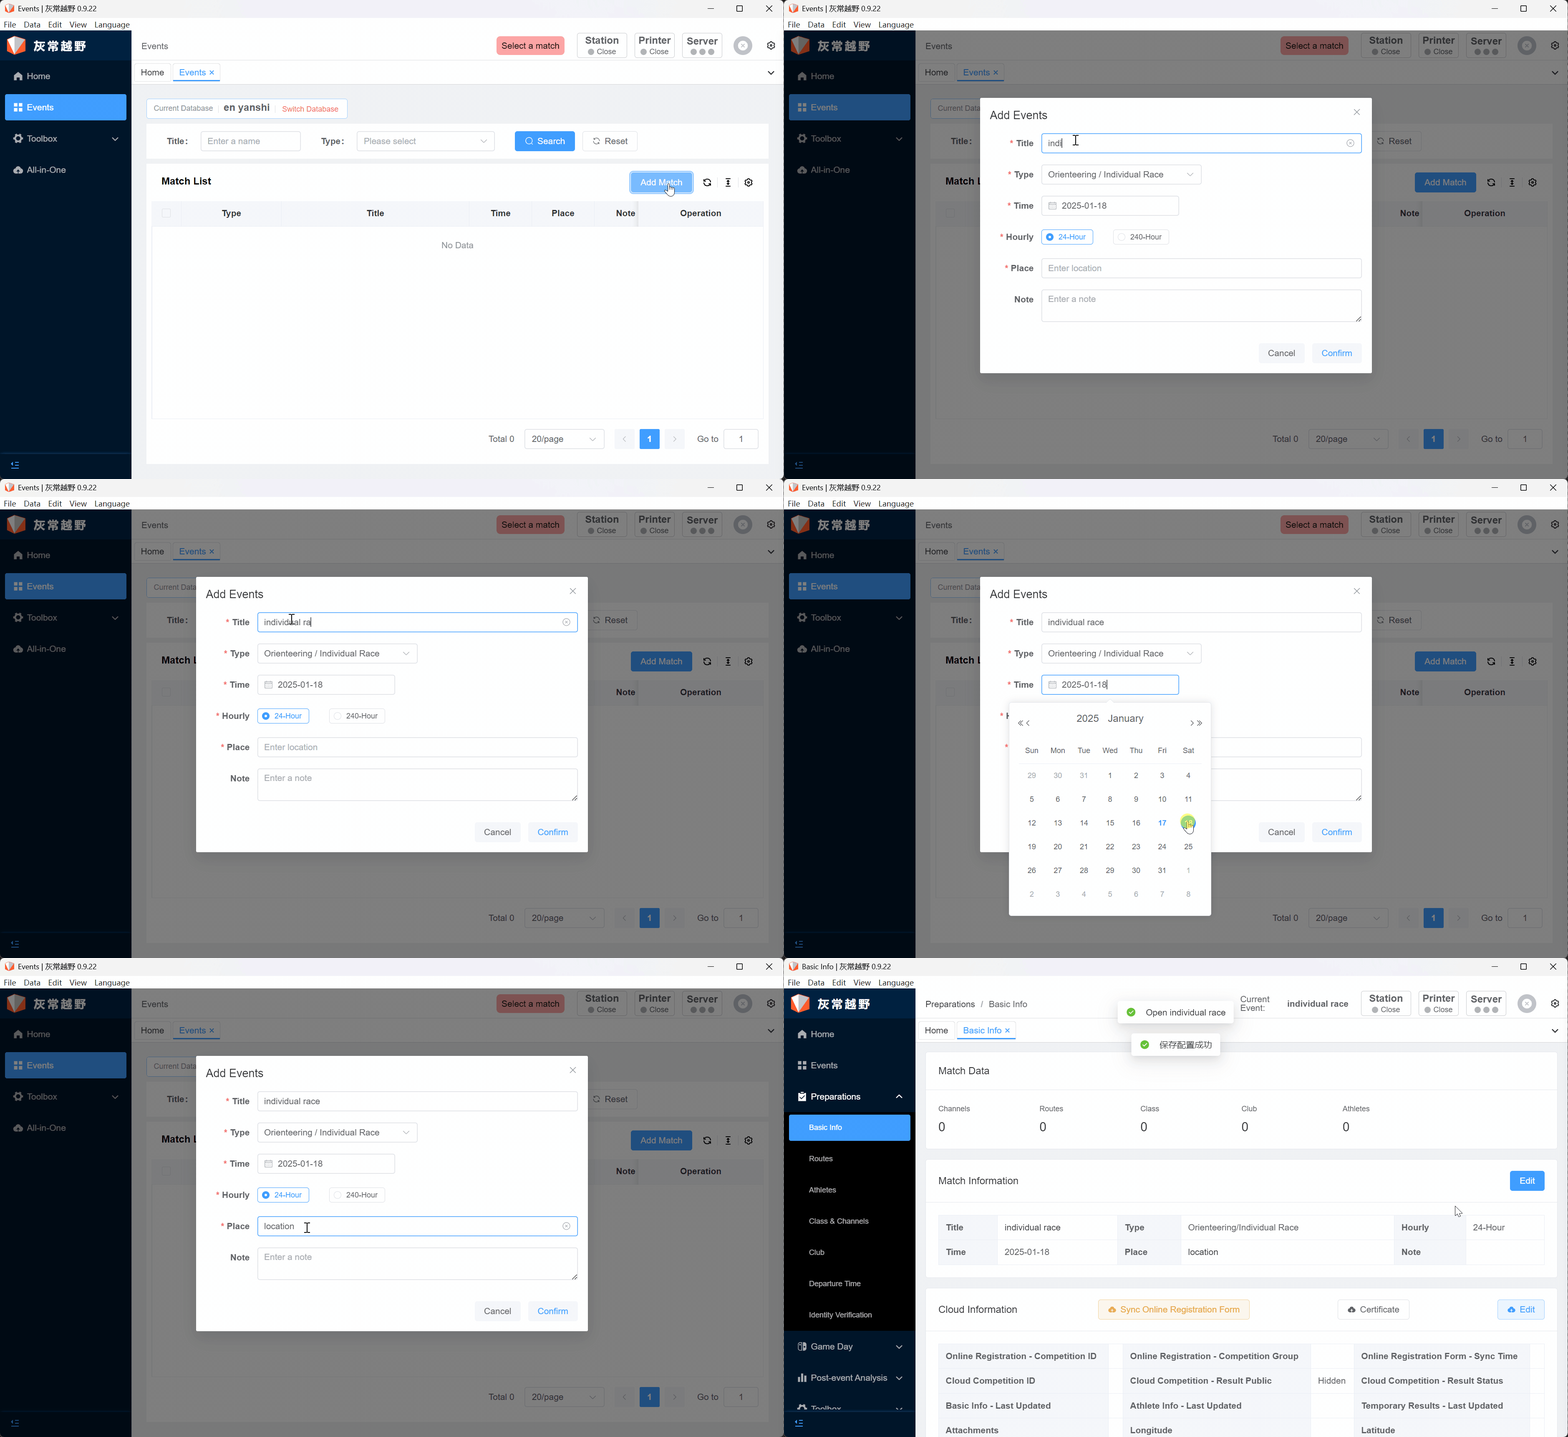
Second Step: Athlete List
This module is mainly used to introduce the specific operations of filling in the athlete list, importing athletes, and entering athlete cards.
2.1 Export Template
Click the left menu bar Athlete column, select Export List, click the Export Template button, and export the athlete list template (do not delete the content in the table, otherwise the import list will fail). 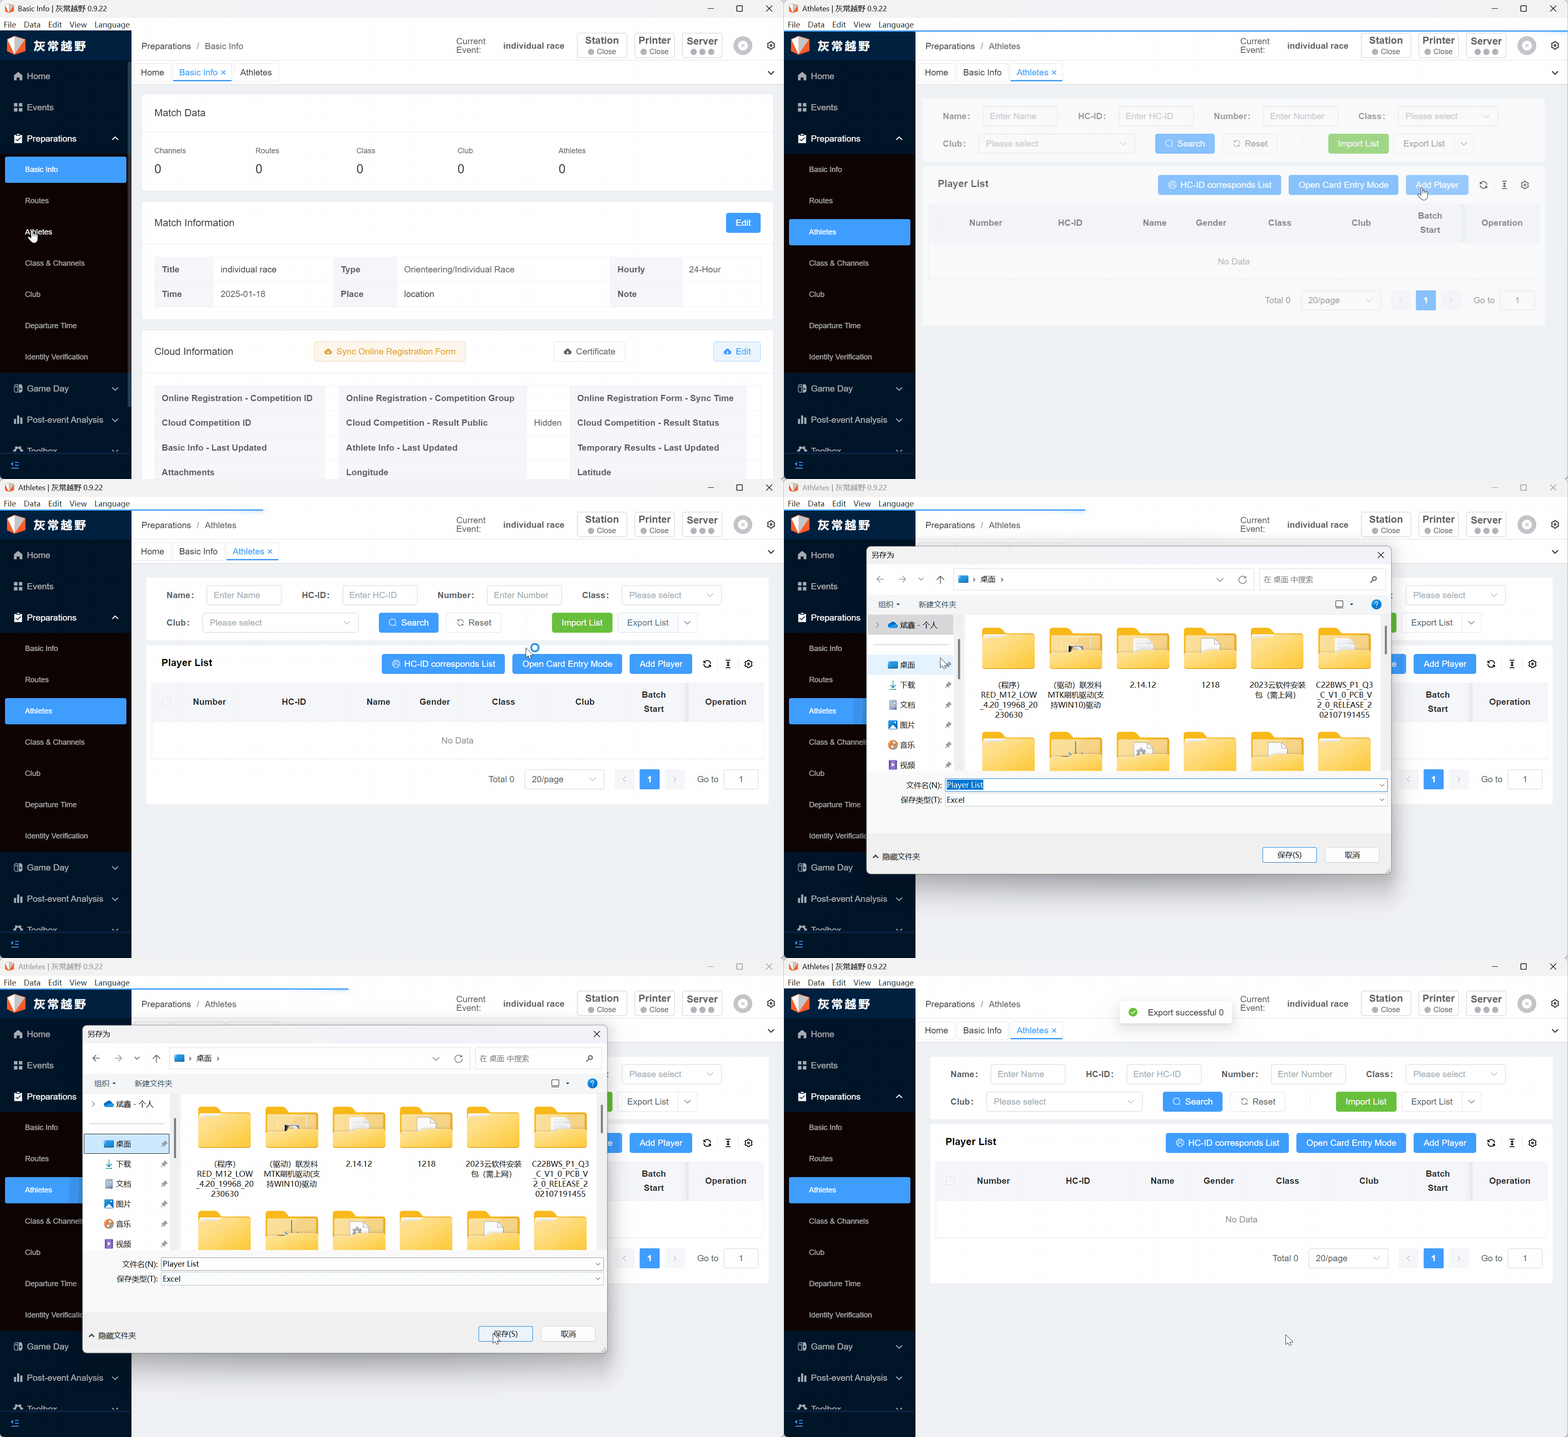
2.2 Fill in the List
The athlete list must be filled in with participant number, group, and name. Ensure that the participant number does not appear repeatedly (the unit can be selected).

2.3 Import List
Click the Import List button, and the list will be imported. The system will prompt the number of successful and failed imports (if there is a failure, please check whether the participant number is repeated or whether the column is missing). 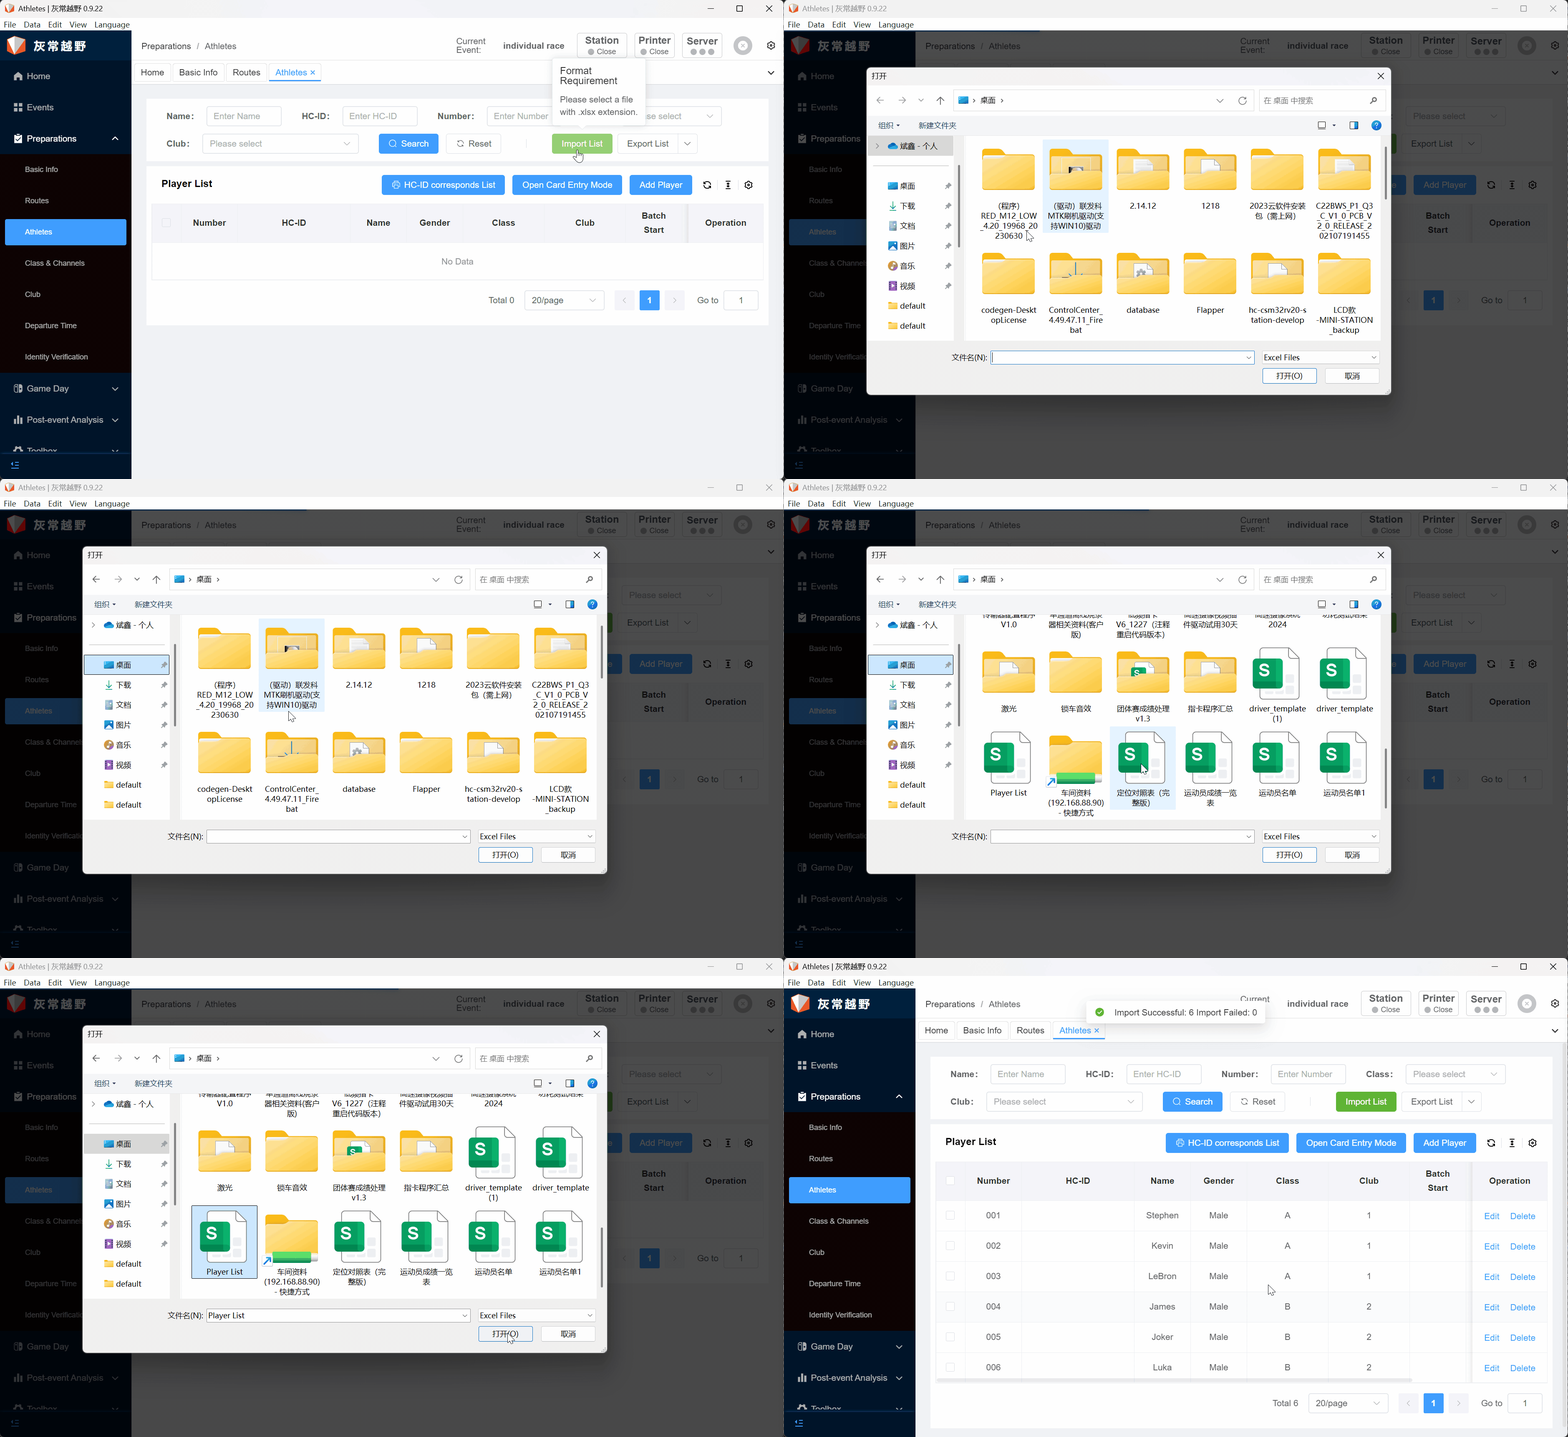
2.4 Check-in Card
Before entering the card, please prepare the relevant hardware equipment: Main Station, Main Station Line. Ensure that the main station line is connected to the main station normally (When the main station is connected normally, the main station will beep once, and the red light at the bottom left will flash).
When entering the card, click the Main Station button on the software, switch to Check-in Mode, select the correct serial port after selecting the correct serial port, click the Status button to open, if the connection with the software is normal, the main station will beep once, if not, it may be because the serial port is selected incorrectly, please select it again. Click the Open Card Check-in Mode button, and then face the card towards the main station, touch the main station to sound it, so you can record the card number. 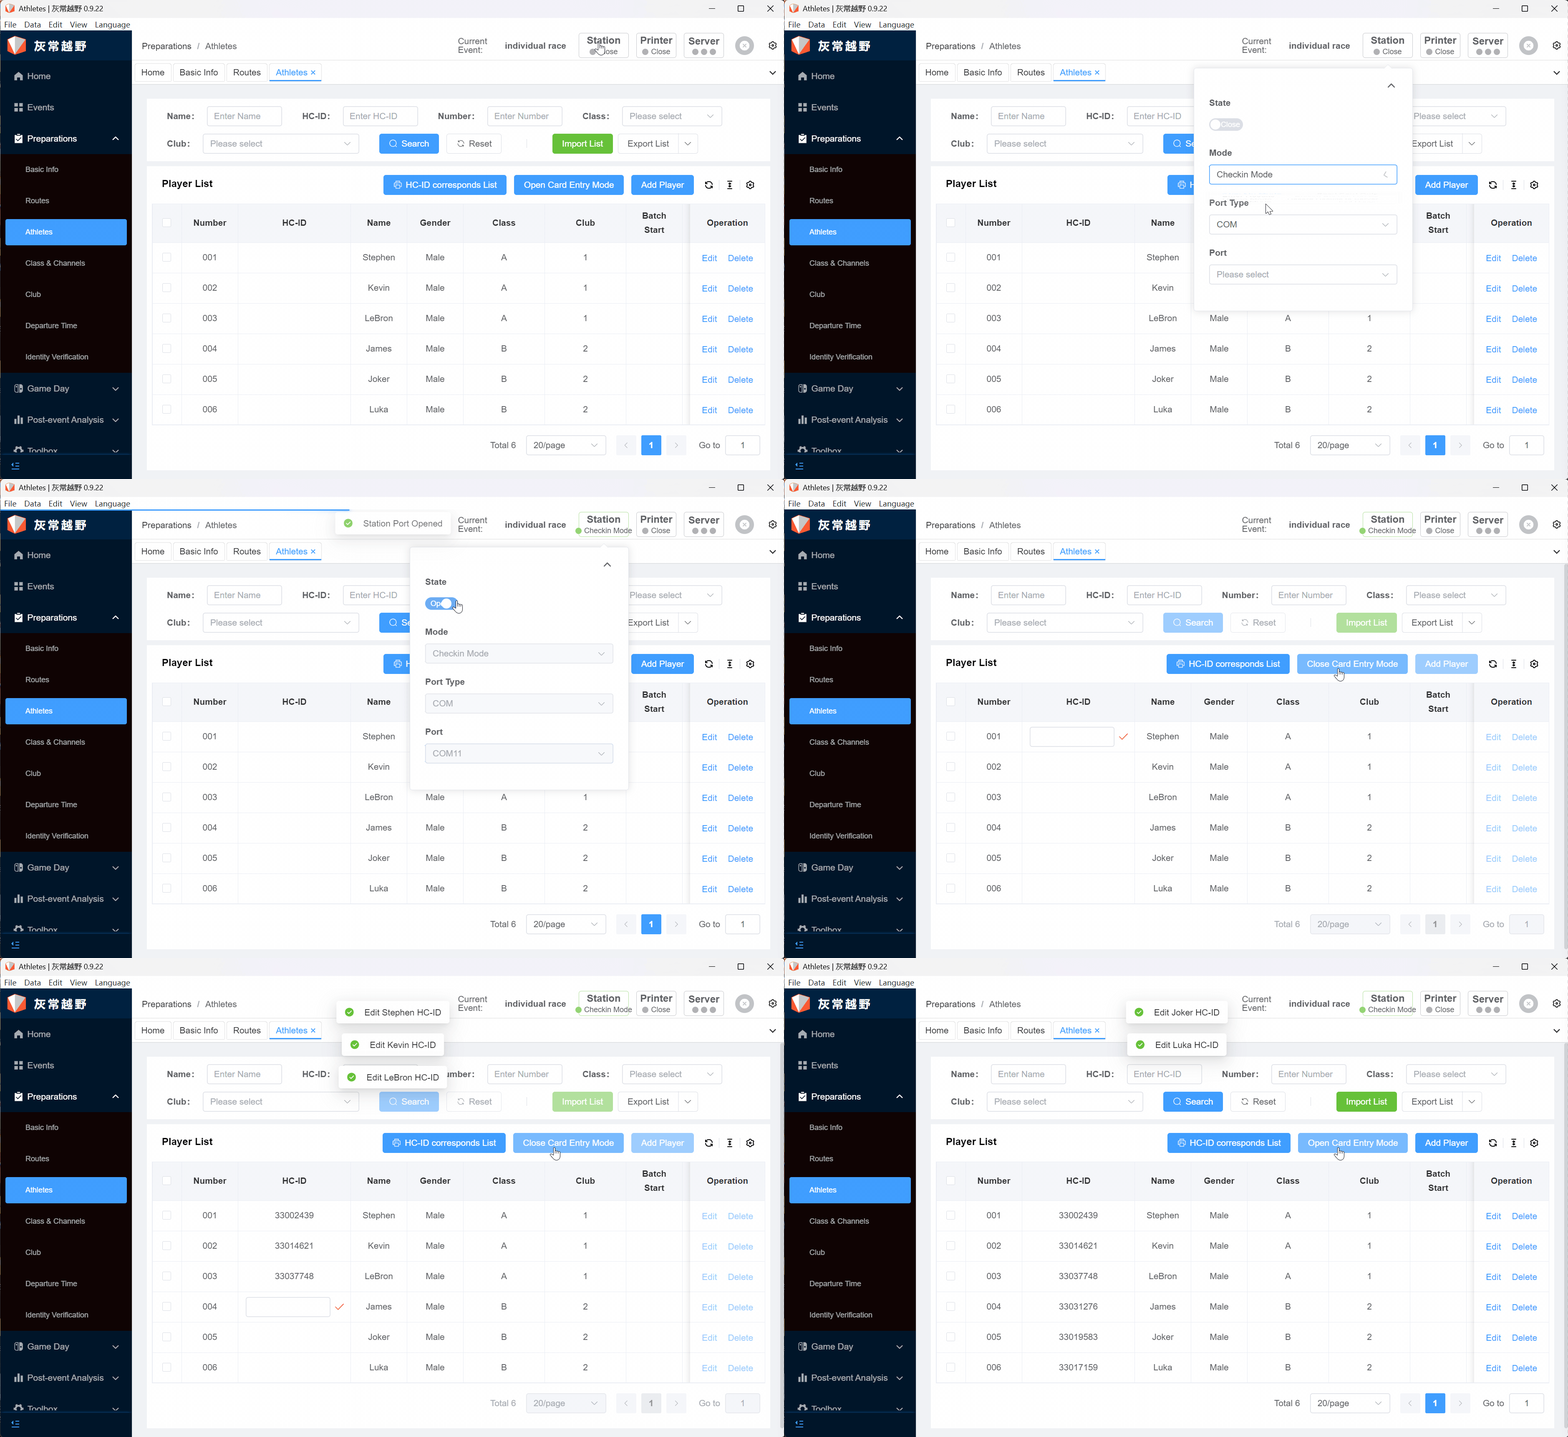
Third Step: Routes and Channels
3.1 Routes
3.1.1 Create Routes
Click the left menu bar Routes column, click the Add Routes drop-down box, click Add Routes by Group, and the routes for the group are created. 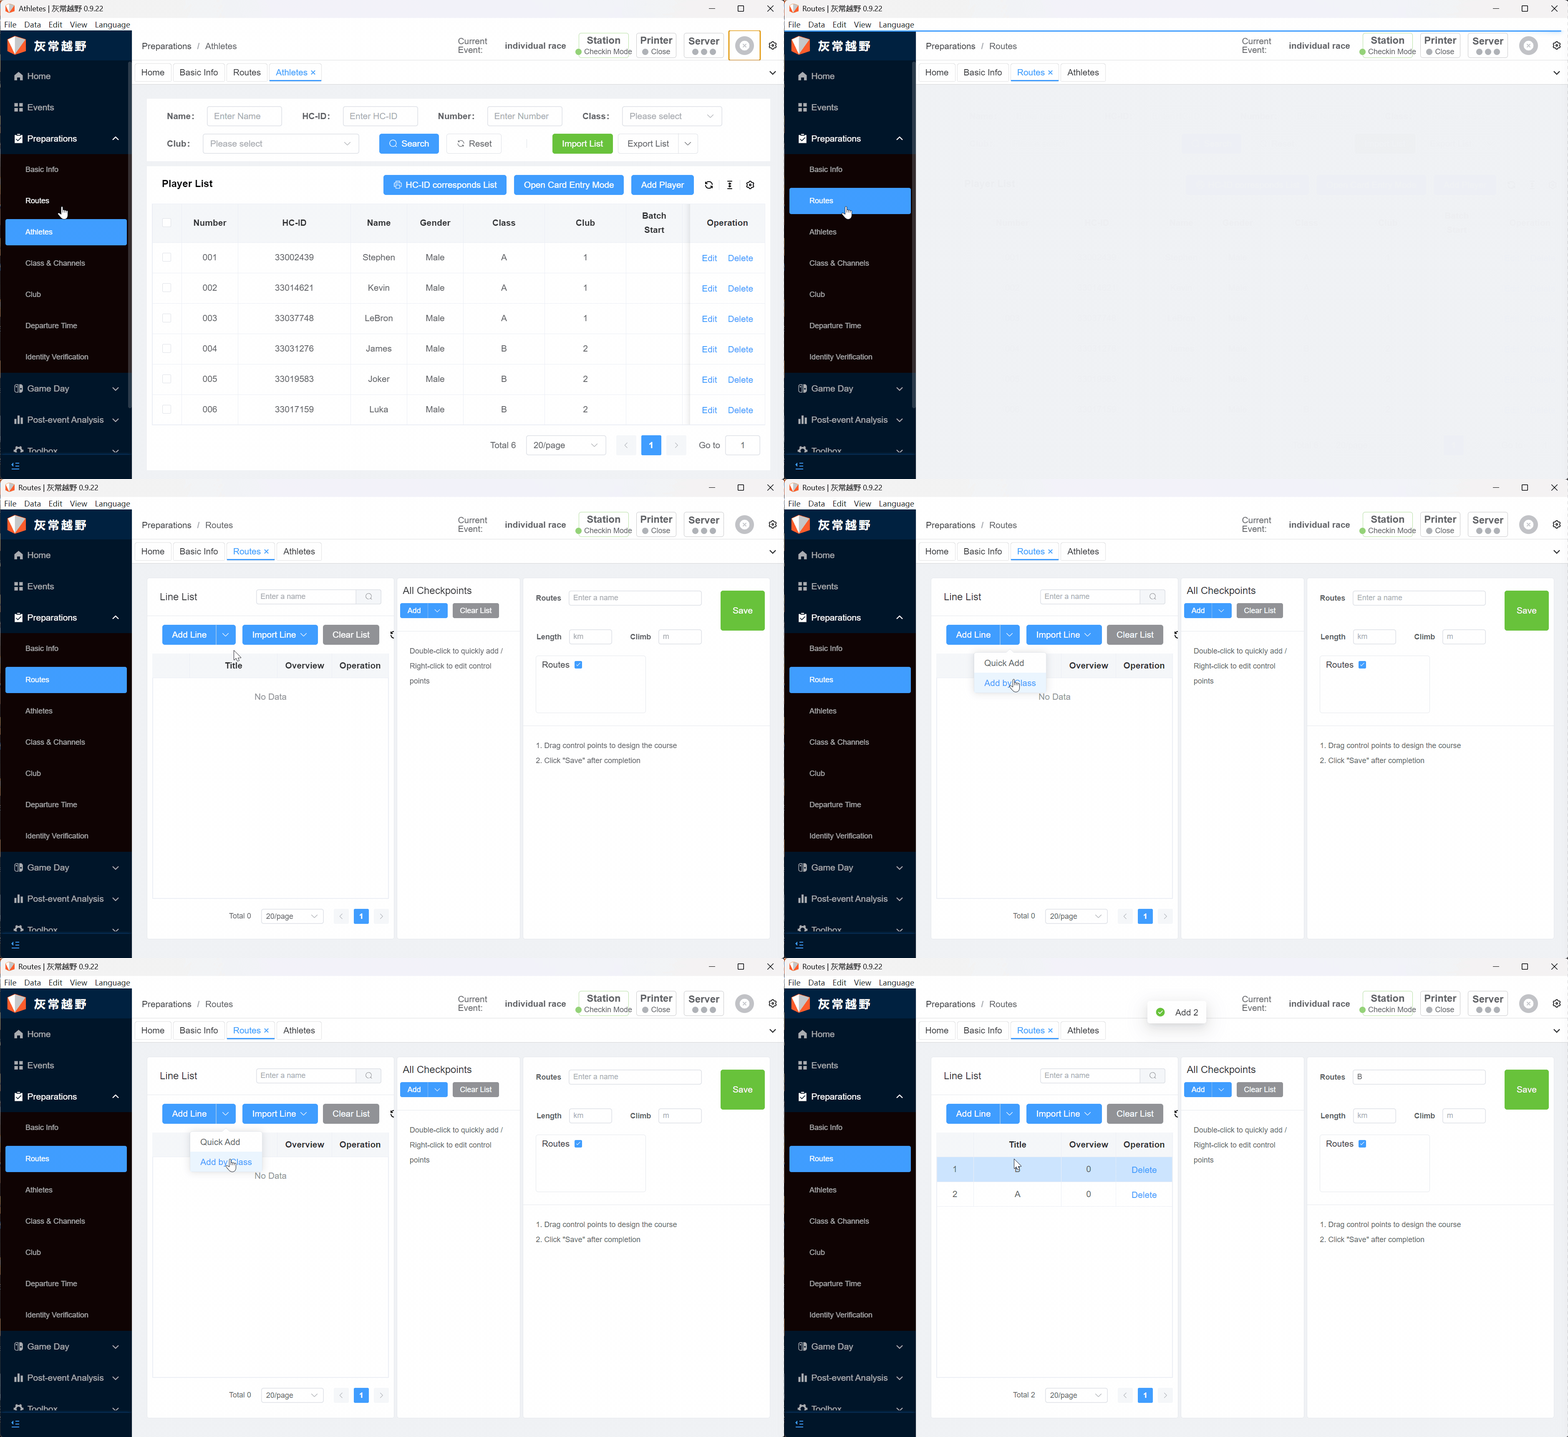
3.1.2 Set Points
In the Routes interface, select the Add drop-down box, select Batch Add (Multiple Continuous Points), click the Confirm button, and the points are created (if the points are far apart, manually add a single point). 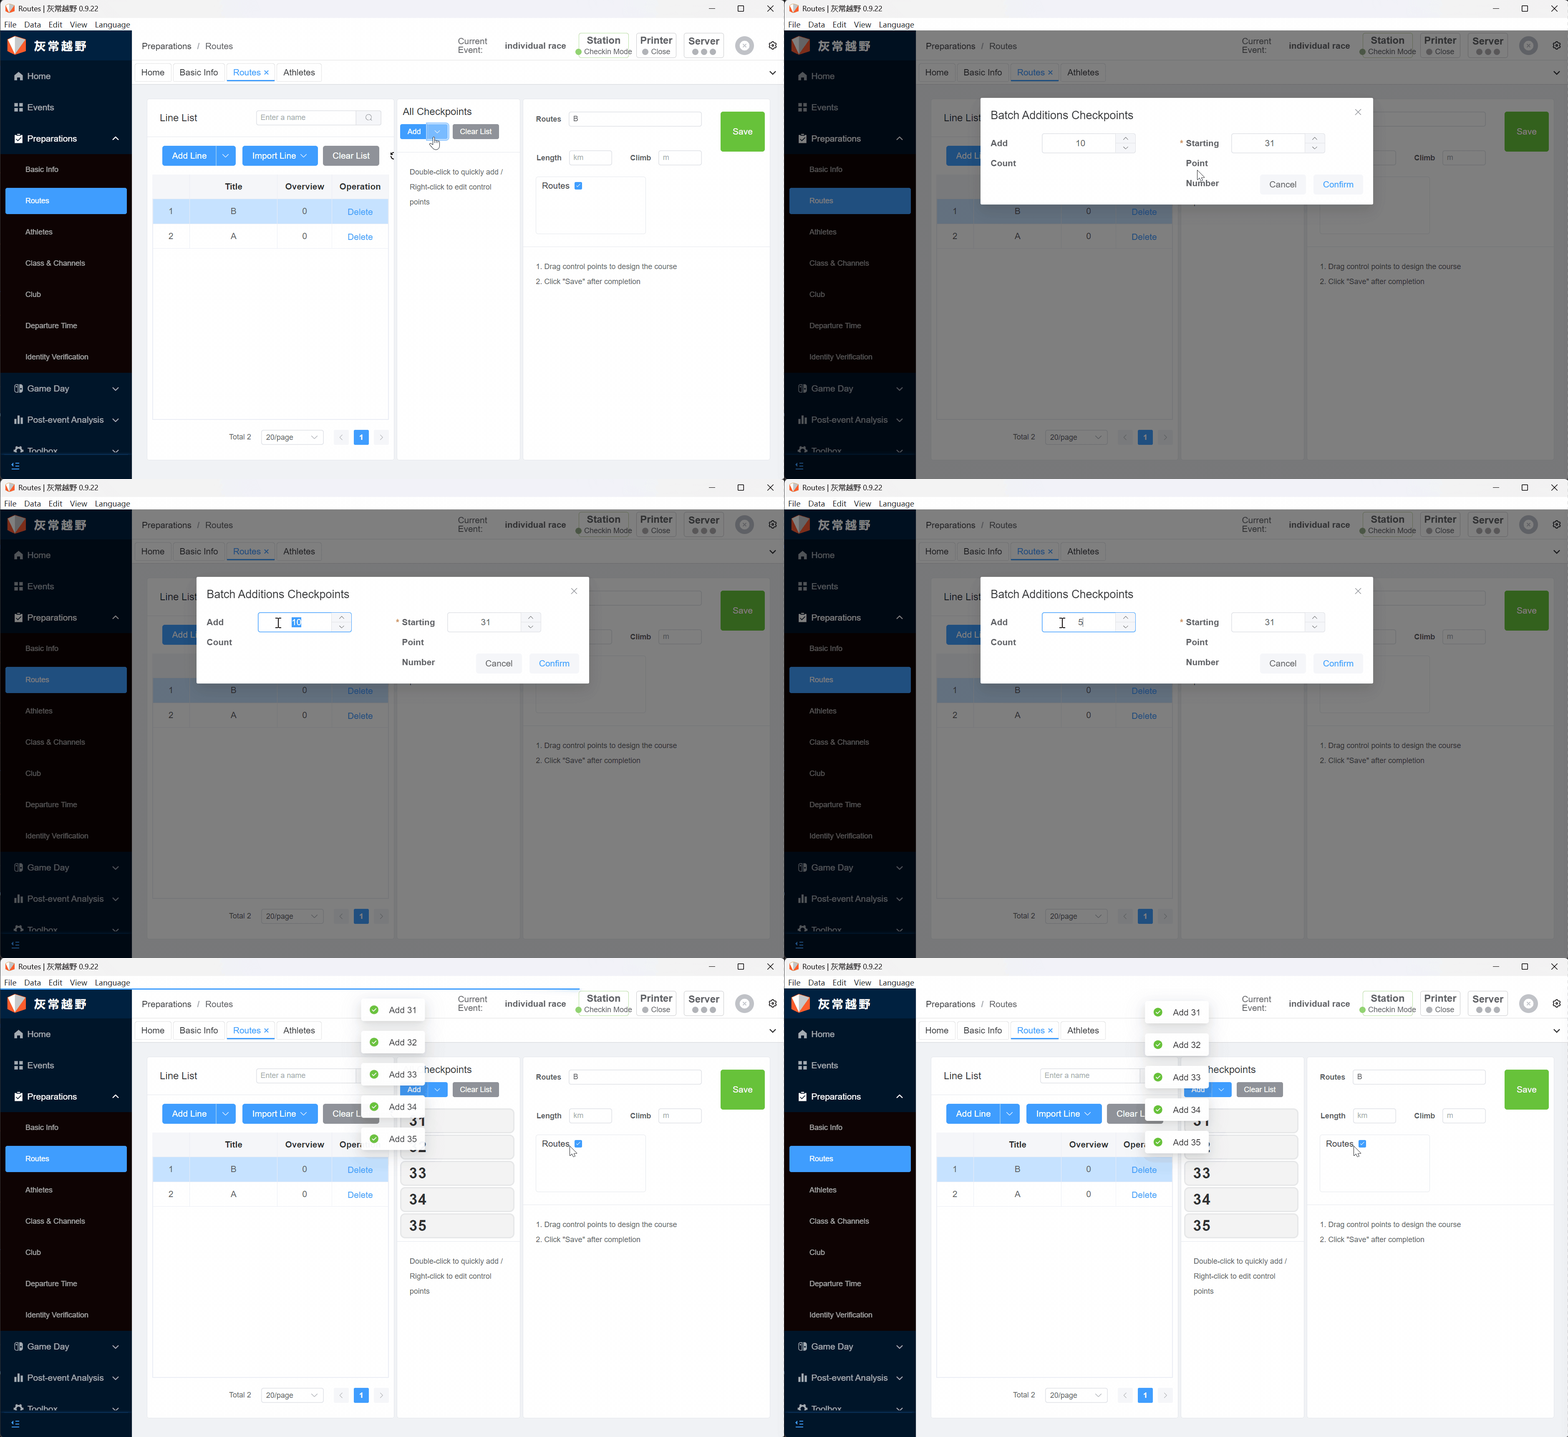
3.1.3 Edit Routes
Edit the routes for different groups according to the newly added points, and place the points in the routes in the order of the actual competition route points (note: the point order cannot be reversed, and the routes must be saved after the routes are set). 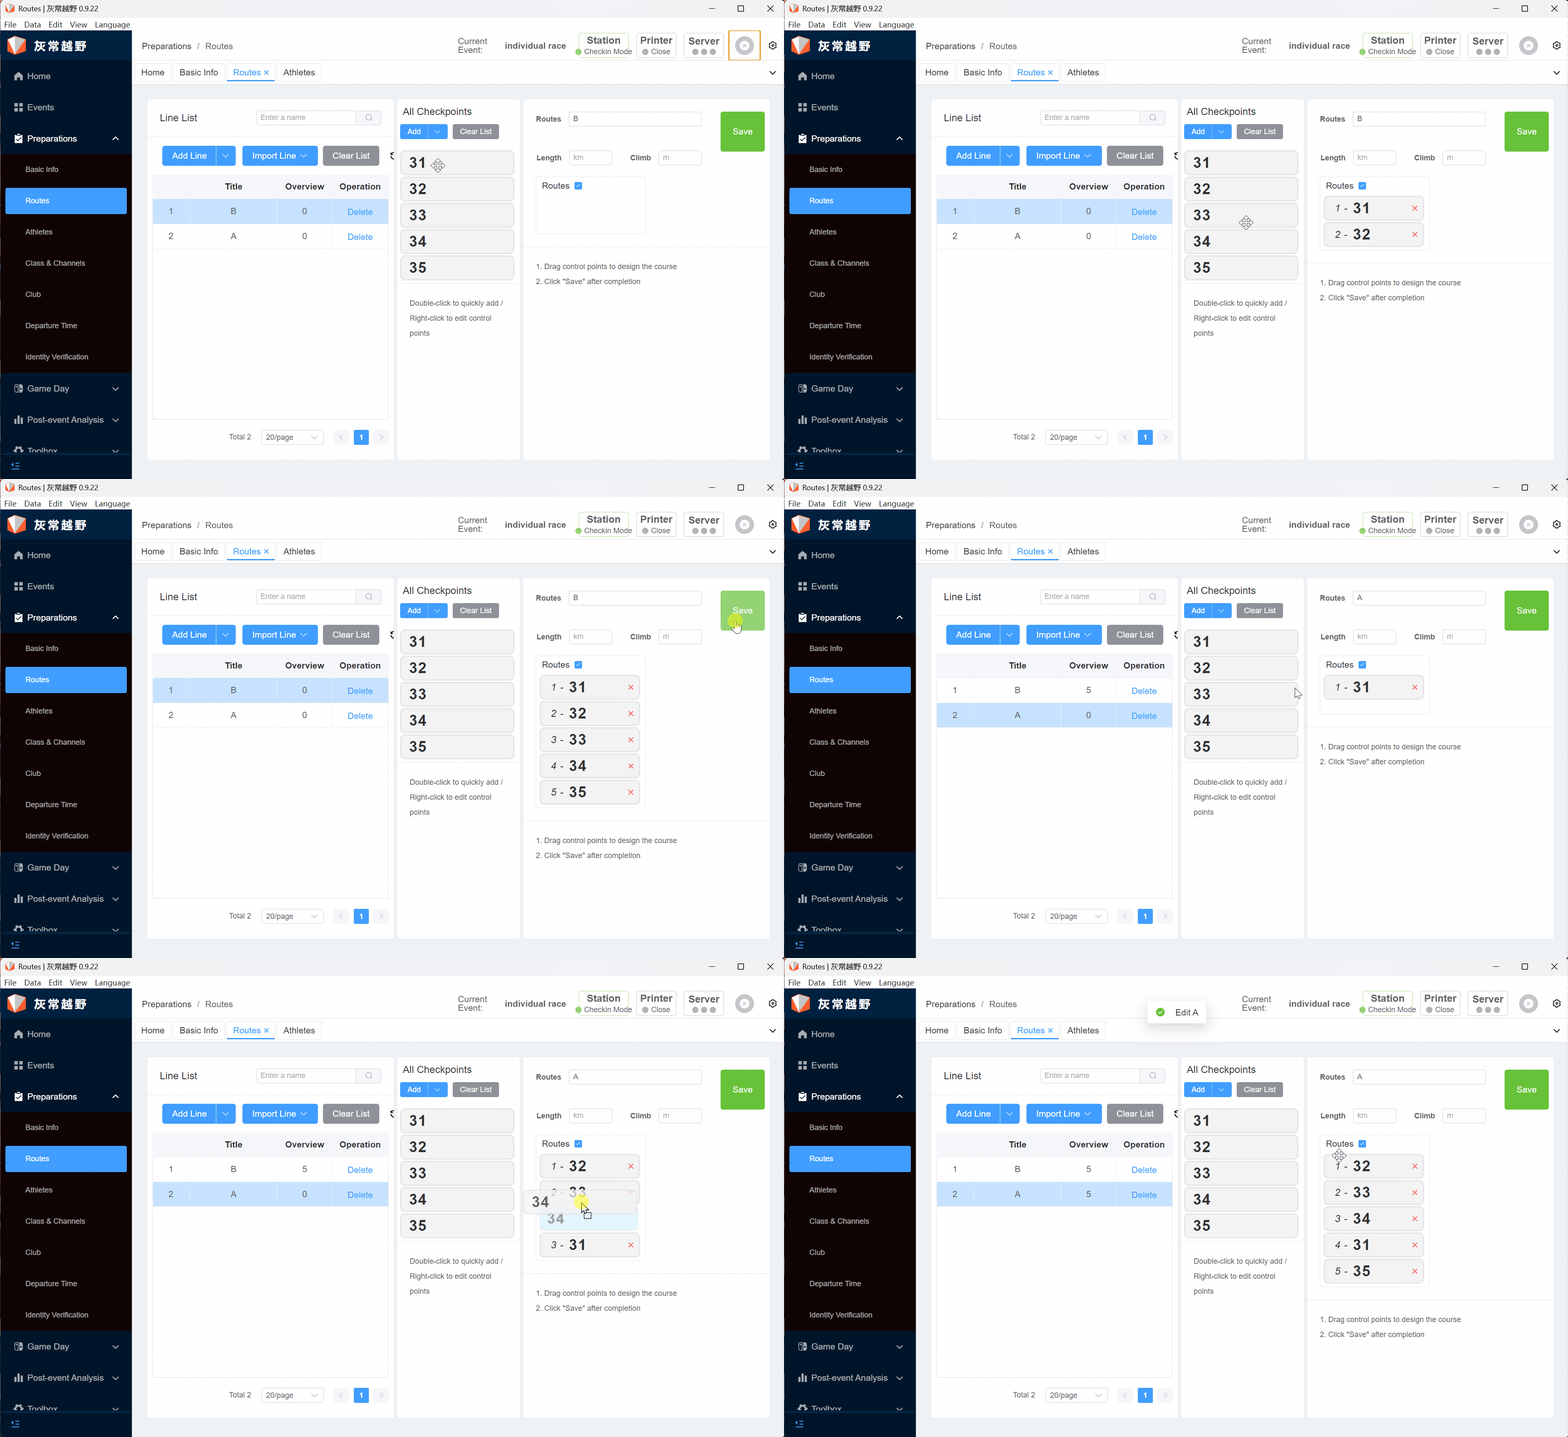
3.2 Channels
3.2.1 Match Routes and Channels
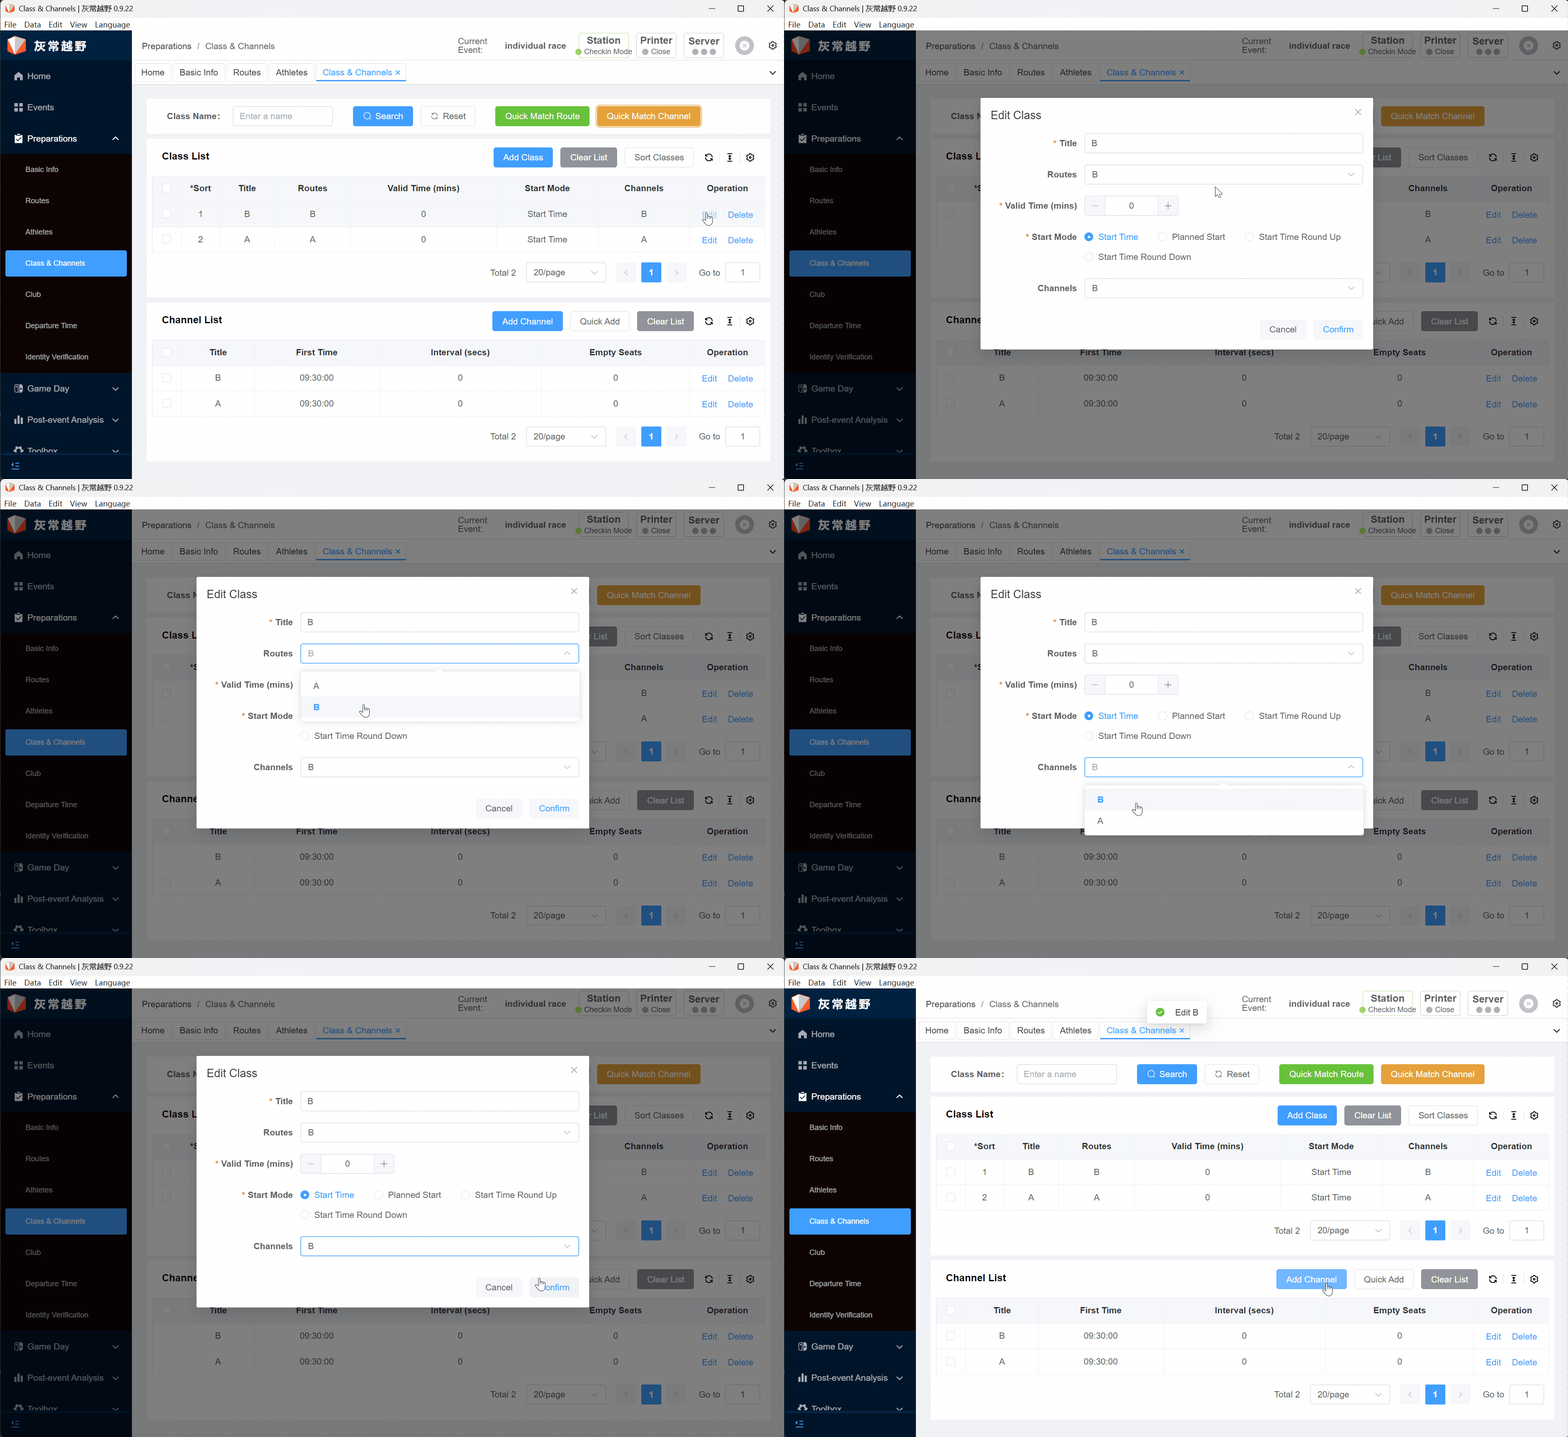
In the Group & Channel interface, click the Quick Match Routes button and the Quick Match Channels button. The Quick Match Routes automatically matches the routes with the same name as the group name, and the Quick Match Channels automatically matches or creates channels with the same name as the group name. 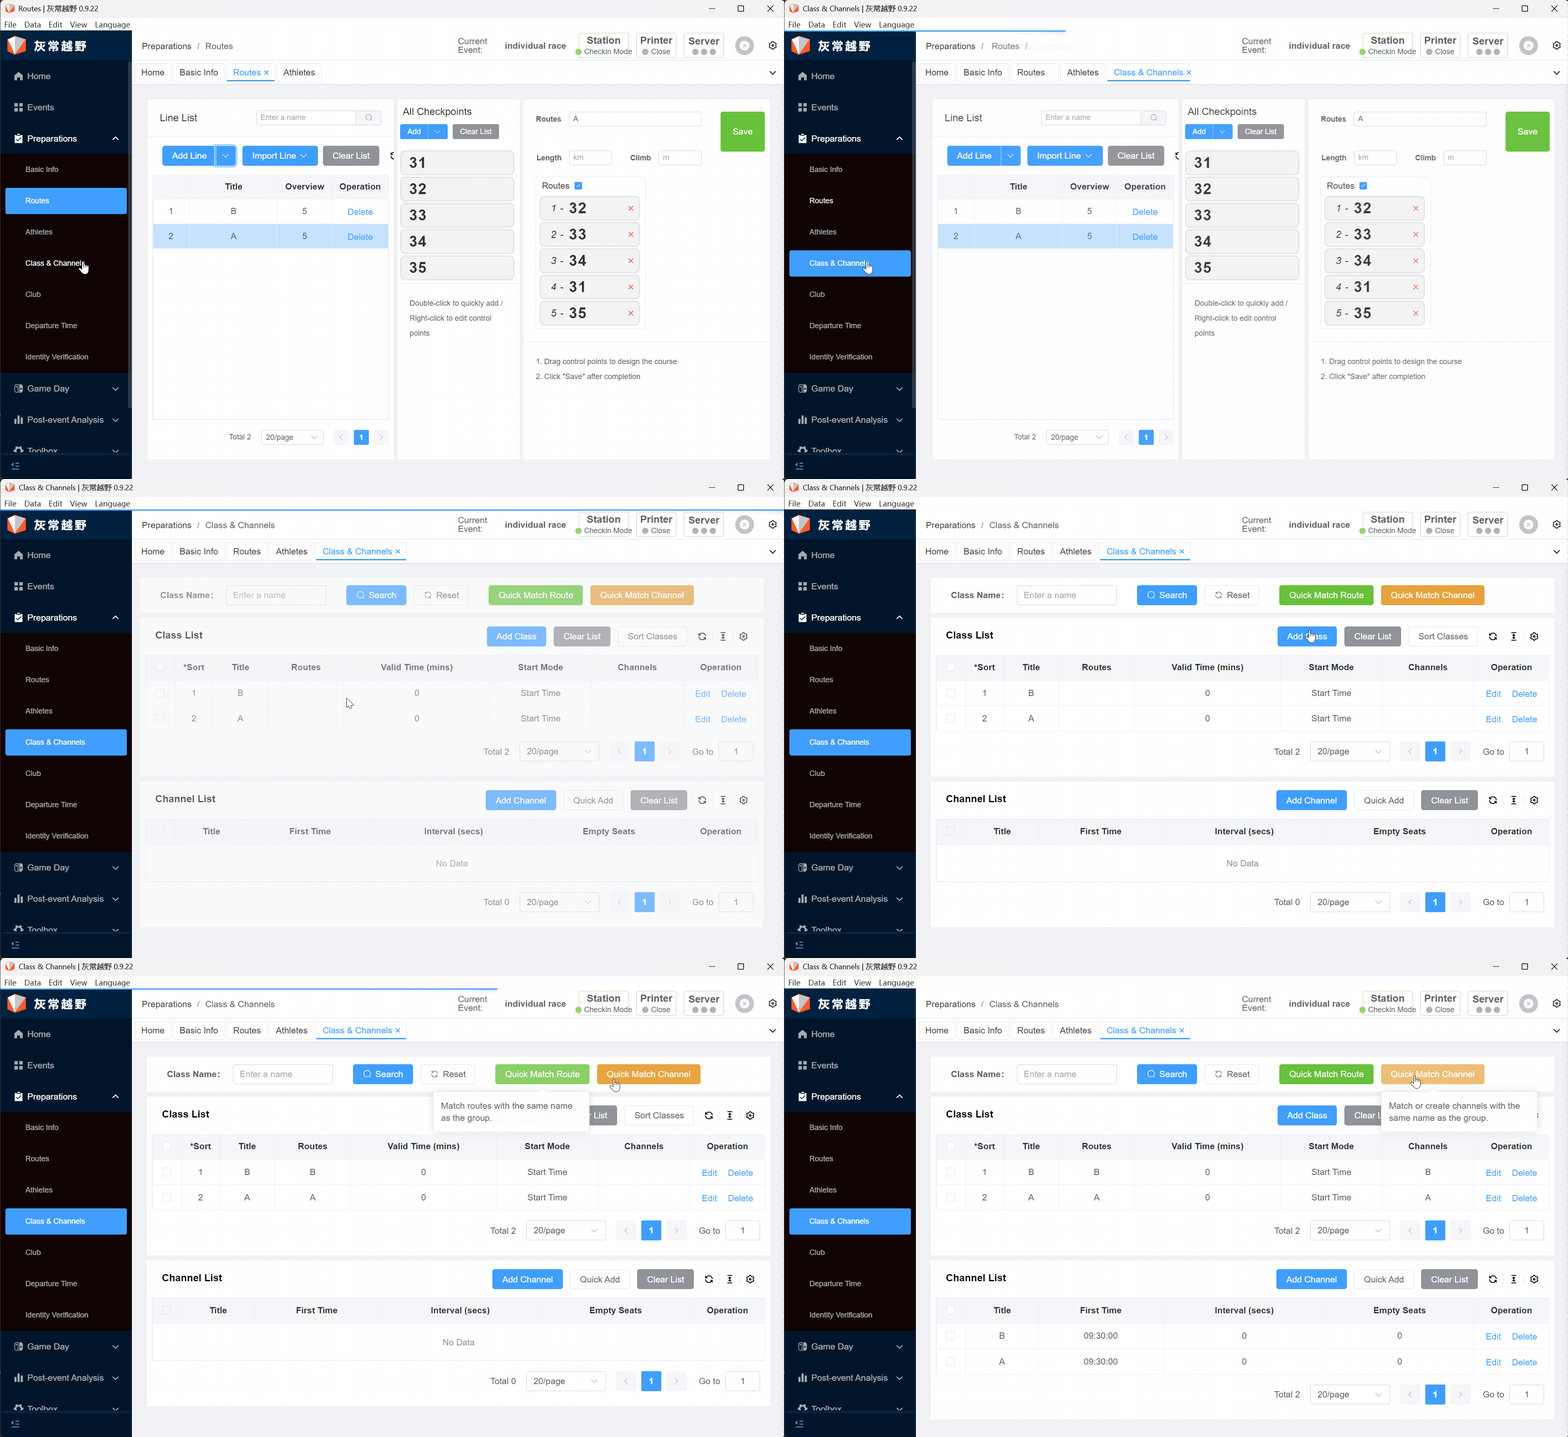
3.2.2 Edit Channels
Note
After clicking the Quick Match Routes and Quick Match Channels buttons, please check whether the name, group, and channel match. If they do not match, manually edit and modify.
Fourth Step: Real-time Score
4.1 Preparation for Input
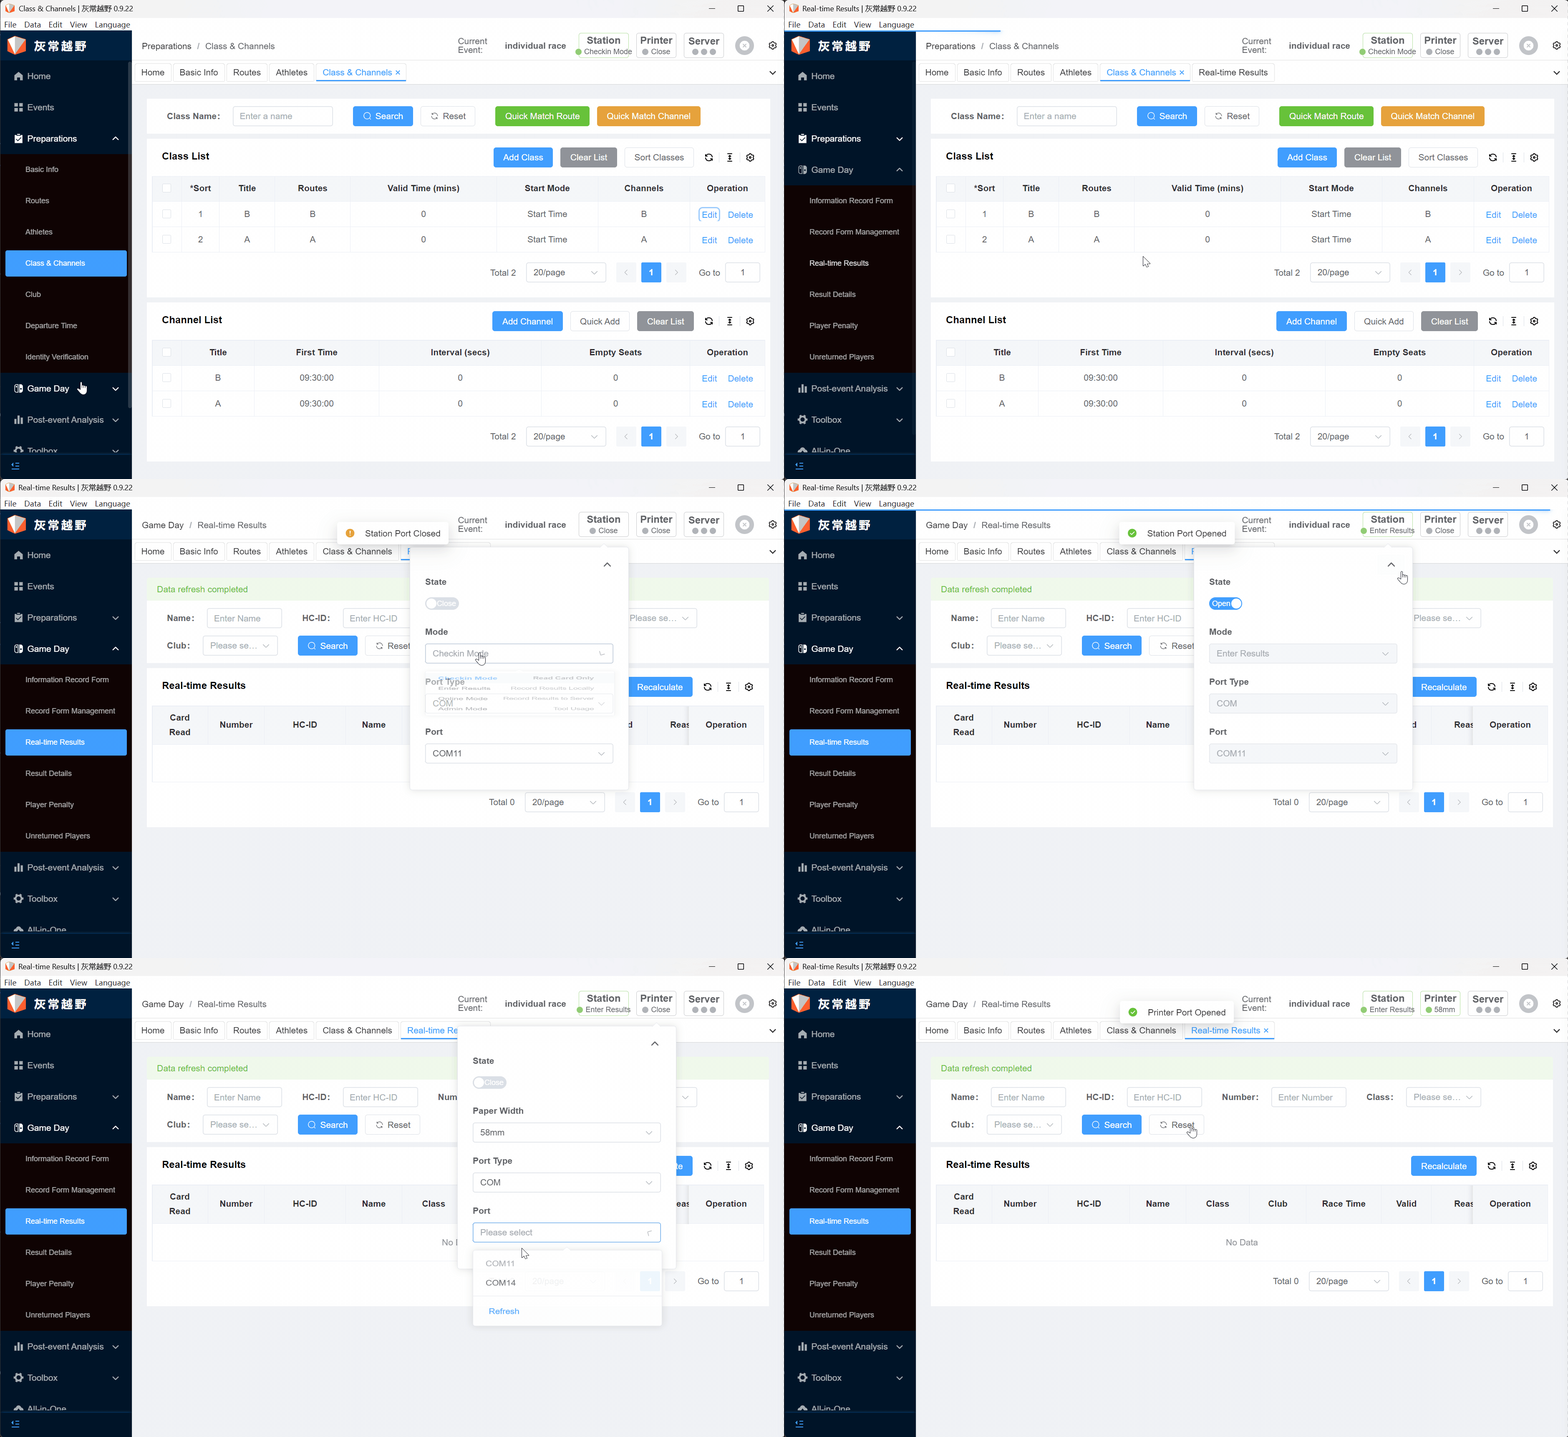
Hardware equipment: Main Station, Main Station Line, and Printer (must be turned on).
In the left menu bar, select the Competition Day column, click the Main Station button, select Score Input, select the correct serial port, click the Status button to open, When the main station is connected normally, the main station will beep once, and the red light at the bottom left will flash, Printer connection success will have Printer Connection Success prompt.
4.2 Score Input
After the preparation is complete, wait for the athletes to complete the points, go to the Score Printing Area (Main Station's Position), face the card towards the main station, and touch the main station to sound it, so you can record the score. 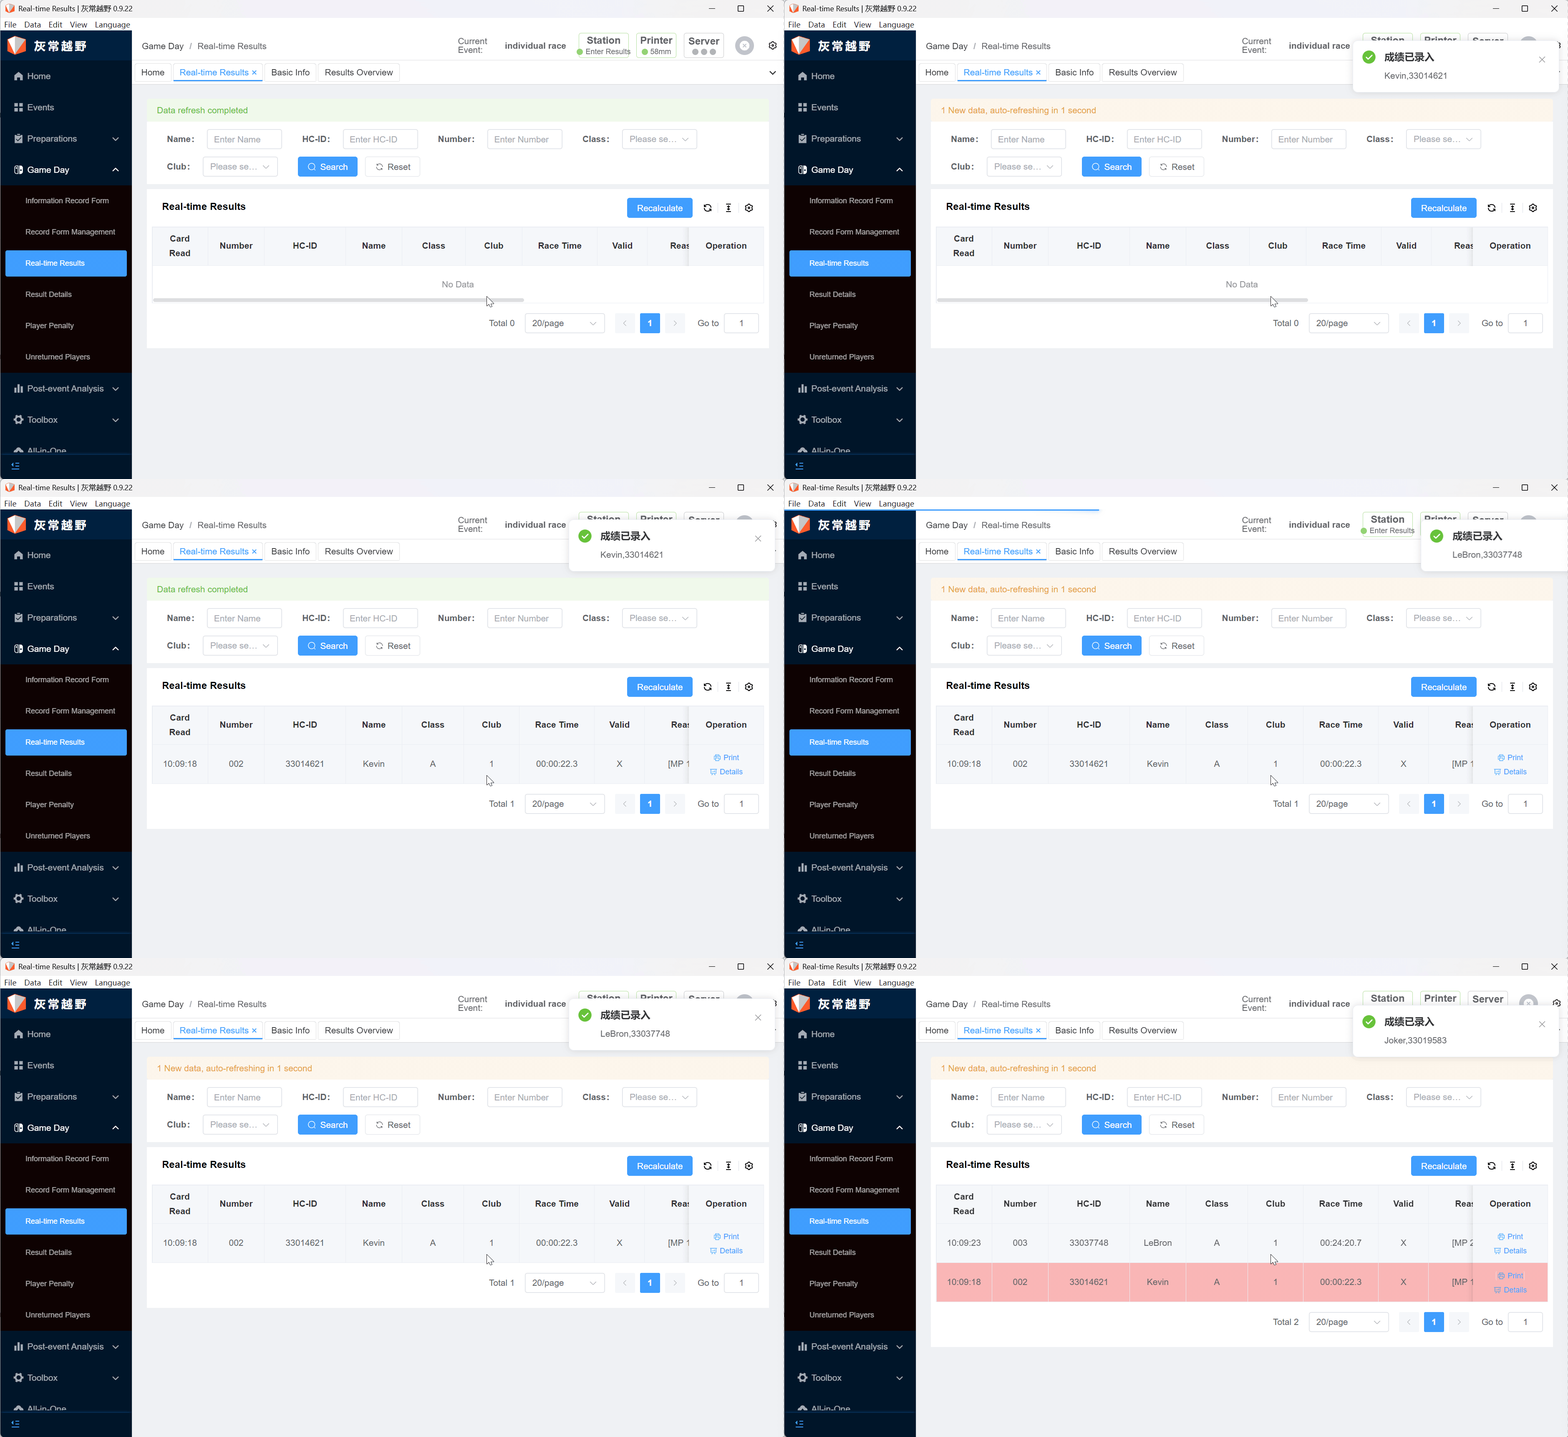
Fifth Step: Unreturned
Click the Unreturned button in the Competition Day column to view the unreturned athletes. 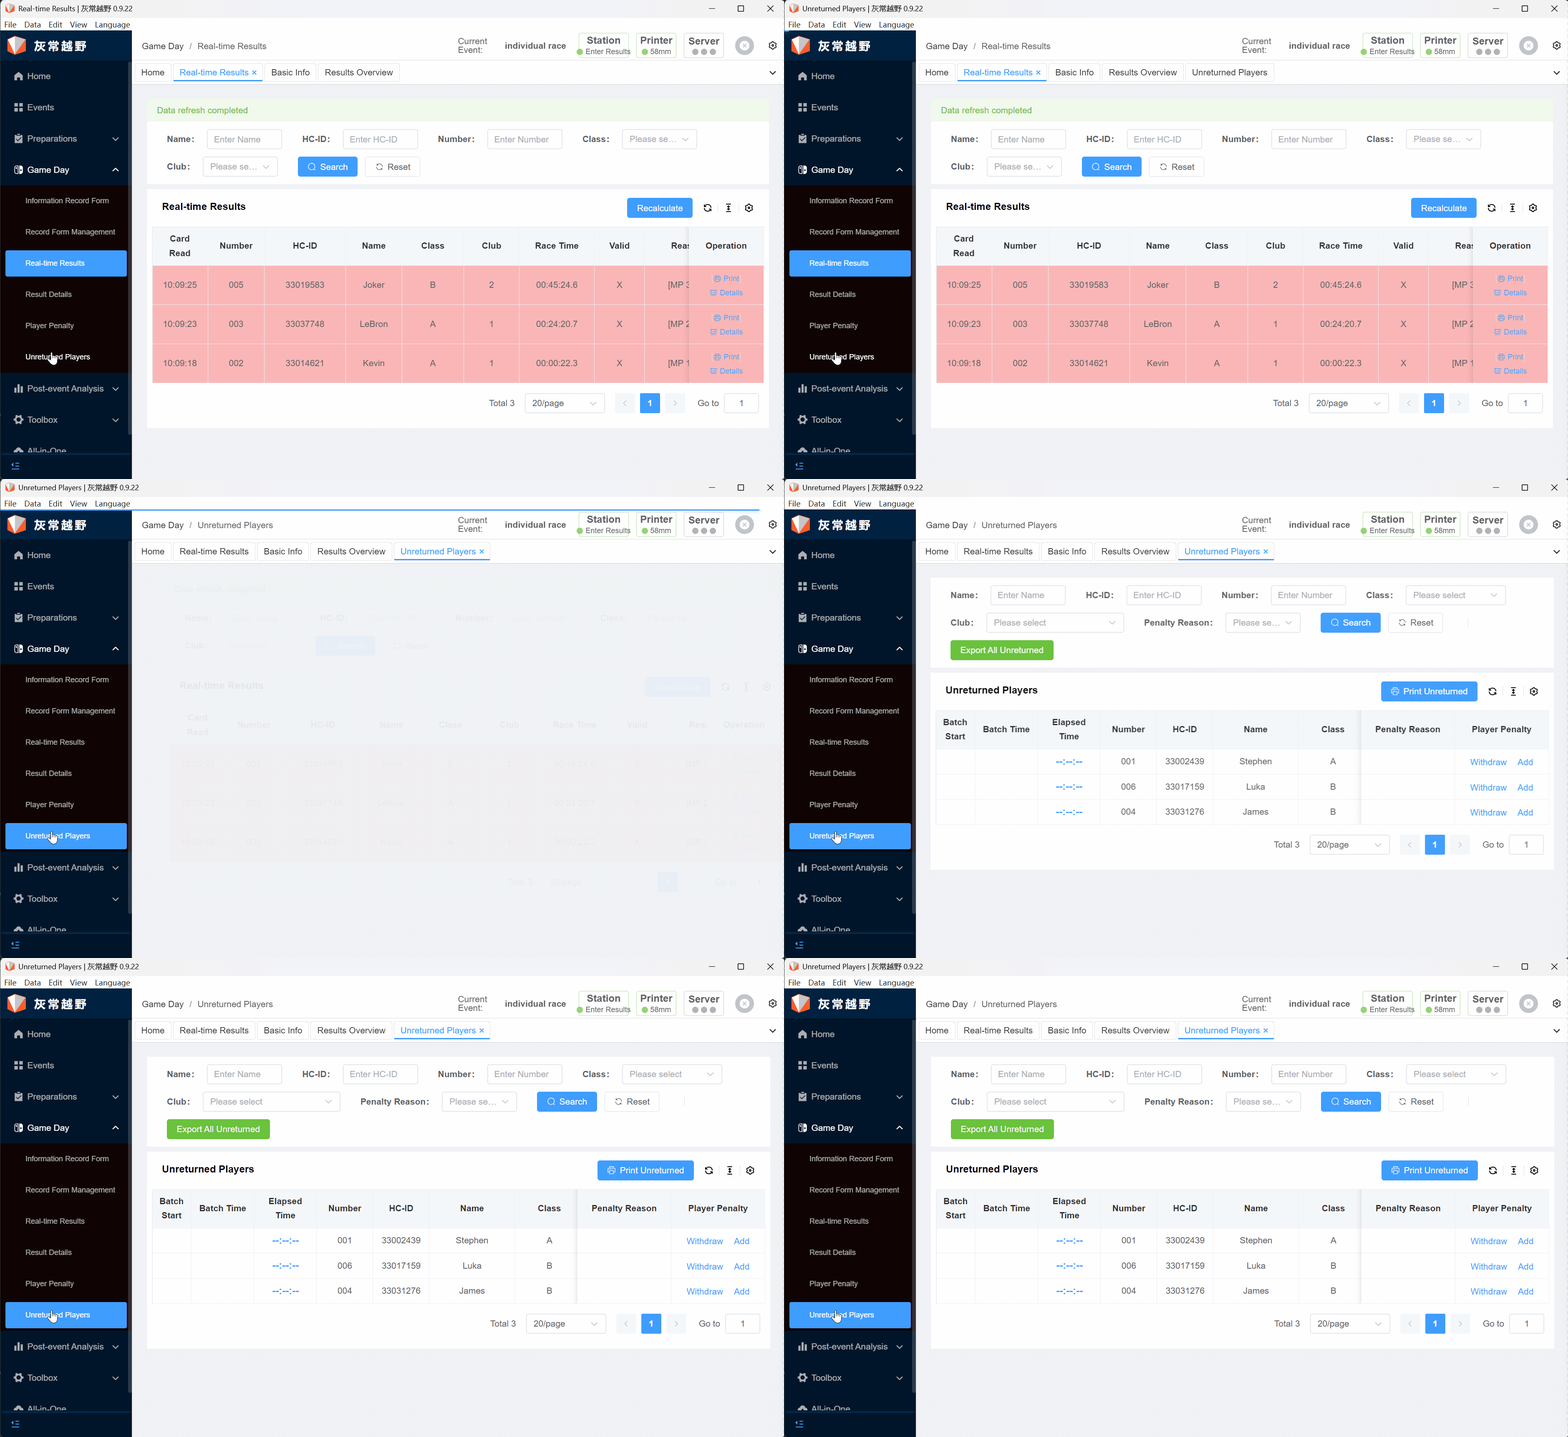
Sixth Step: Export Score
In the Post-Race Analysis column, select Score List, click the Export All Scores button, and you can obtain the score details of all athletes in all groups. 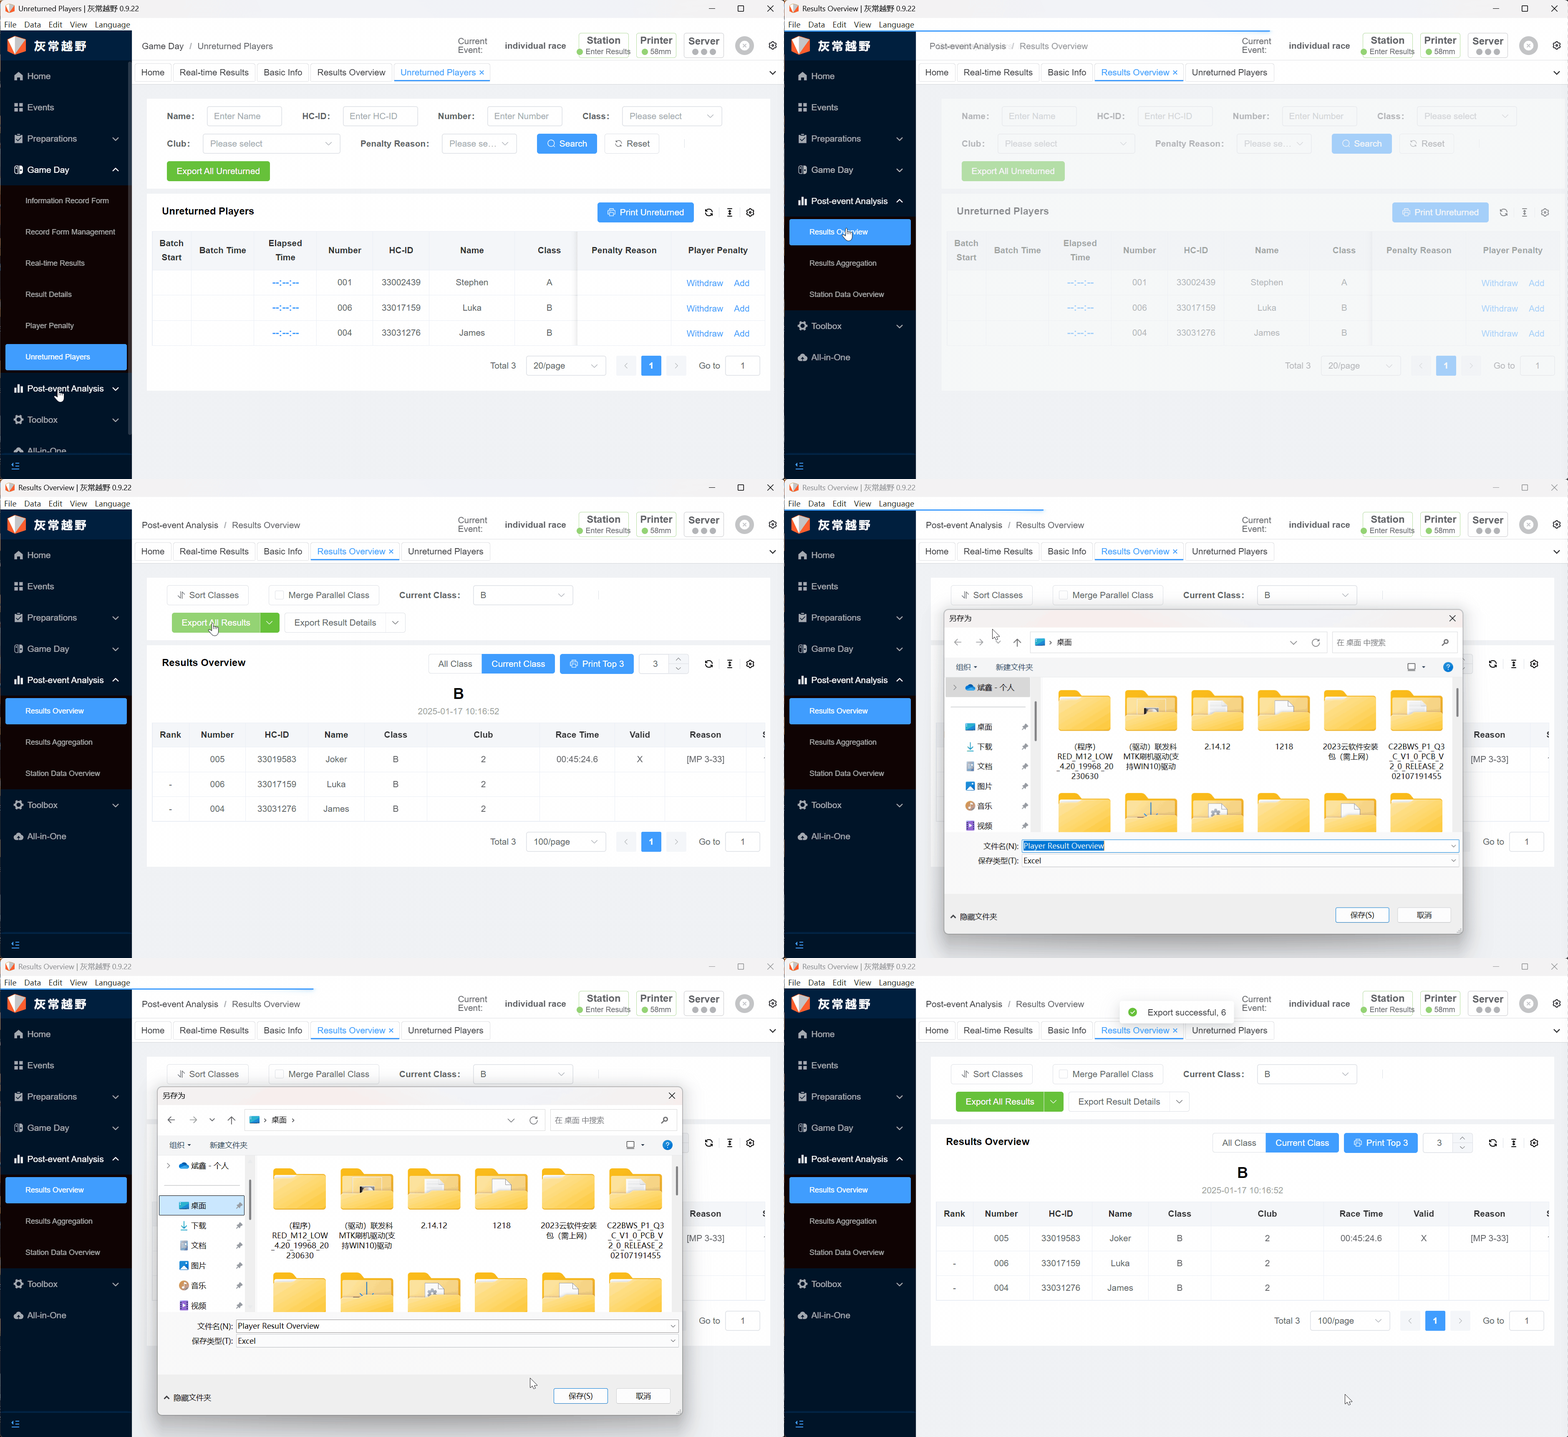
😉😉😉 Congratulations on successfully creating an individual race! Your event can now be launched smoothly. If you wish to further optimize the event, perform more personalized settings, or learn about other advanced features, please click the left menu bar to obtain detailed operation instructions. We believe that you can make the event more perfect through these settings, and we wish your individual race to run smoothly and achieve success!